This area of our documentation is specifically directed towards our Submarine Shopify Payment integrations.

Setup for Cybersource
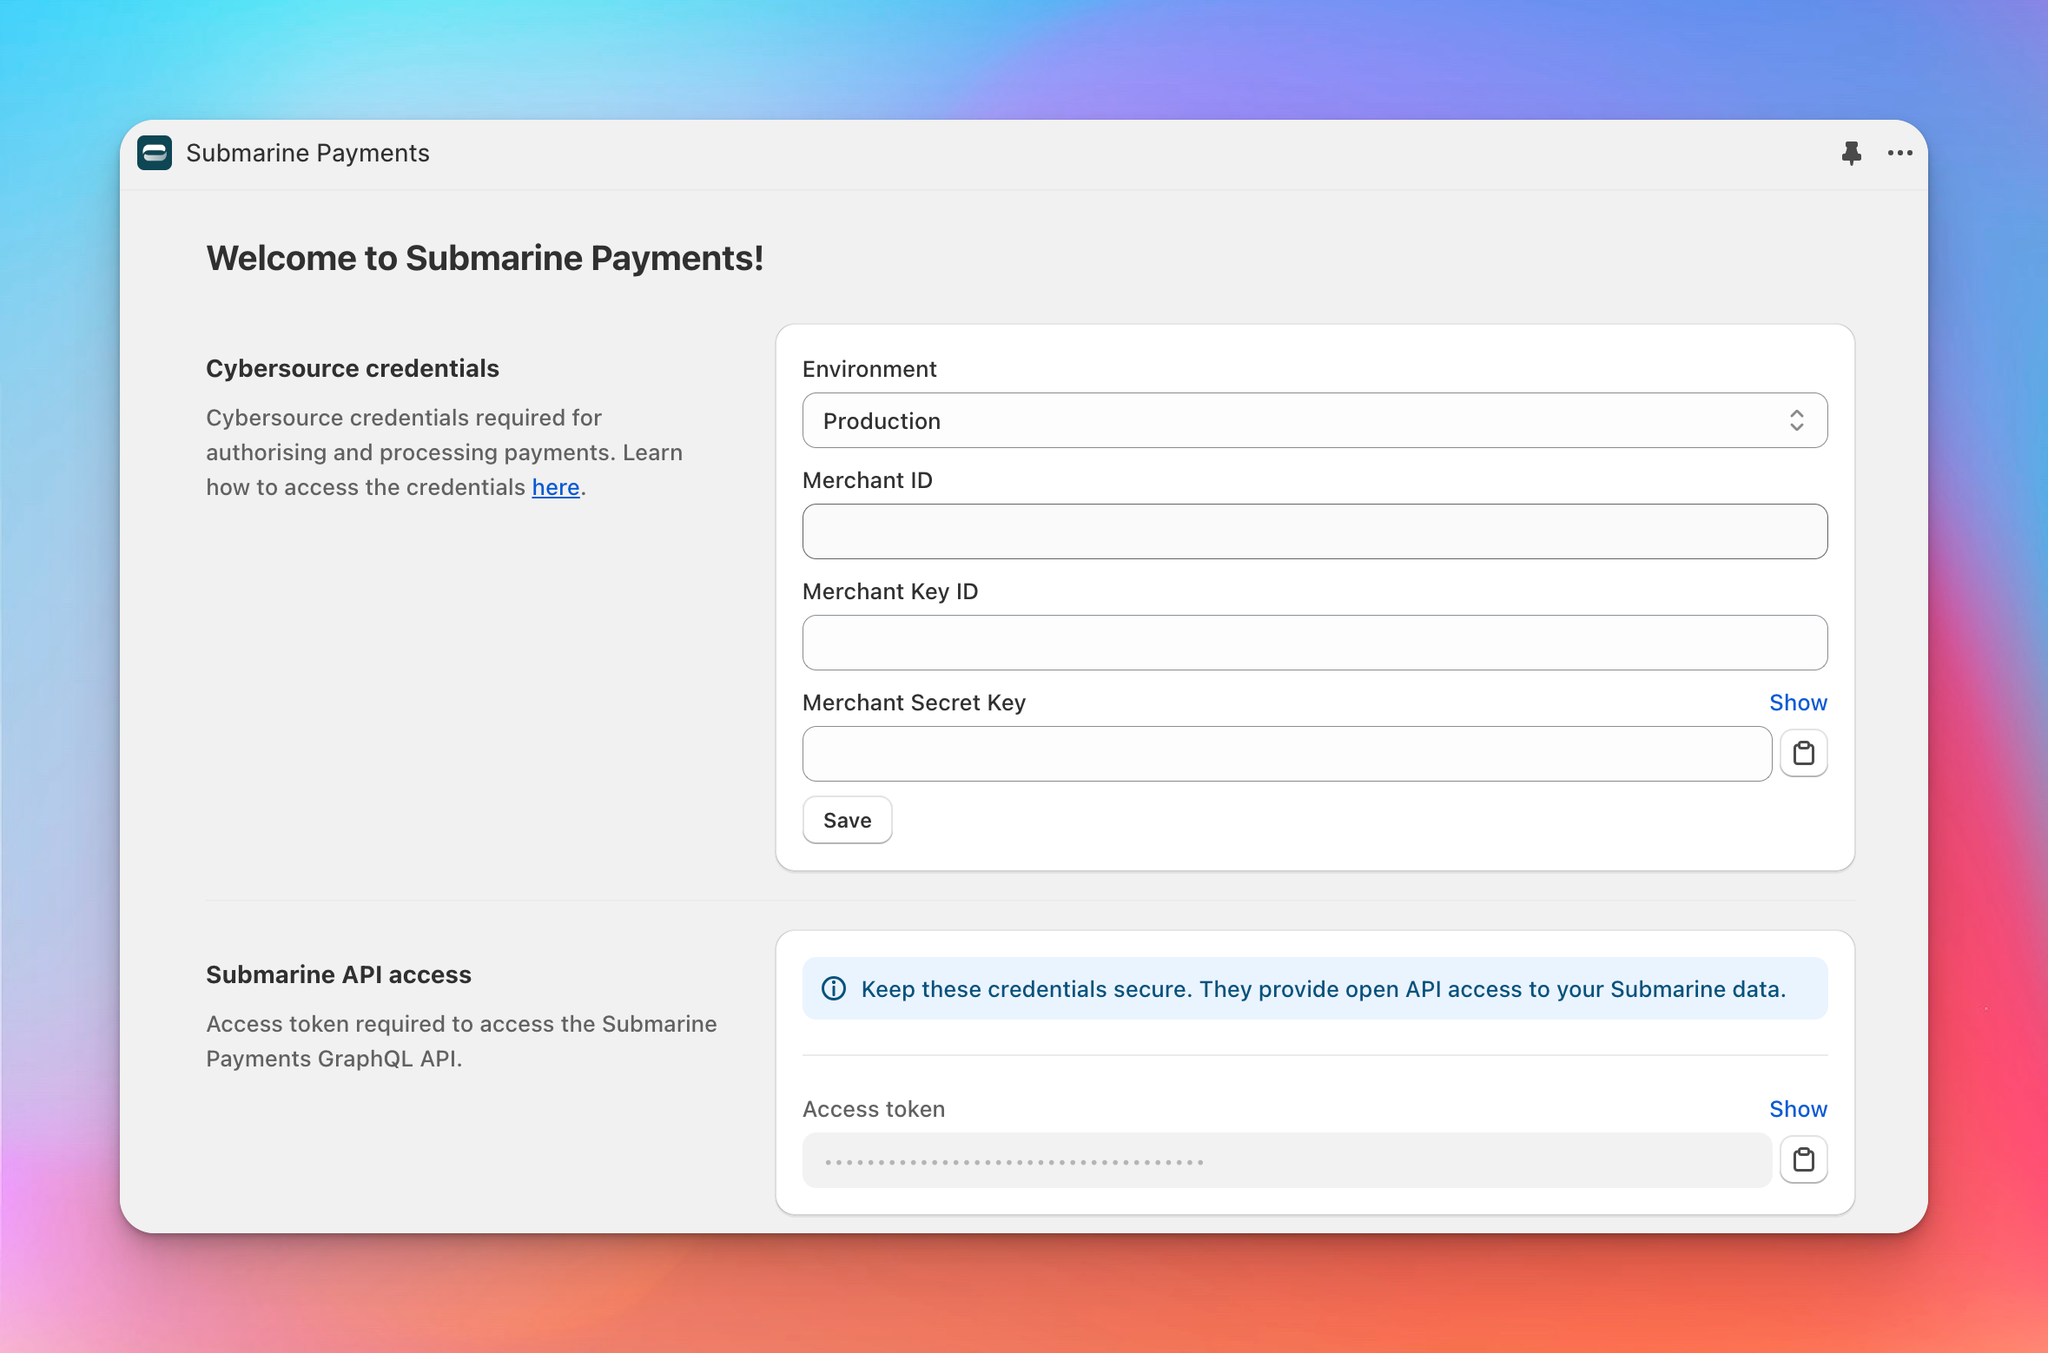
To setup your Submarine Payments follow the steps below;
- Firstly, you need to decide whether the credentials being added are for a Production or Staging environment.
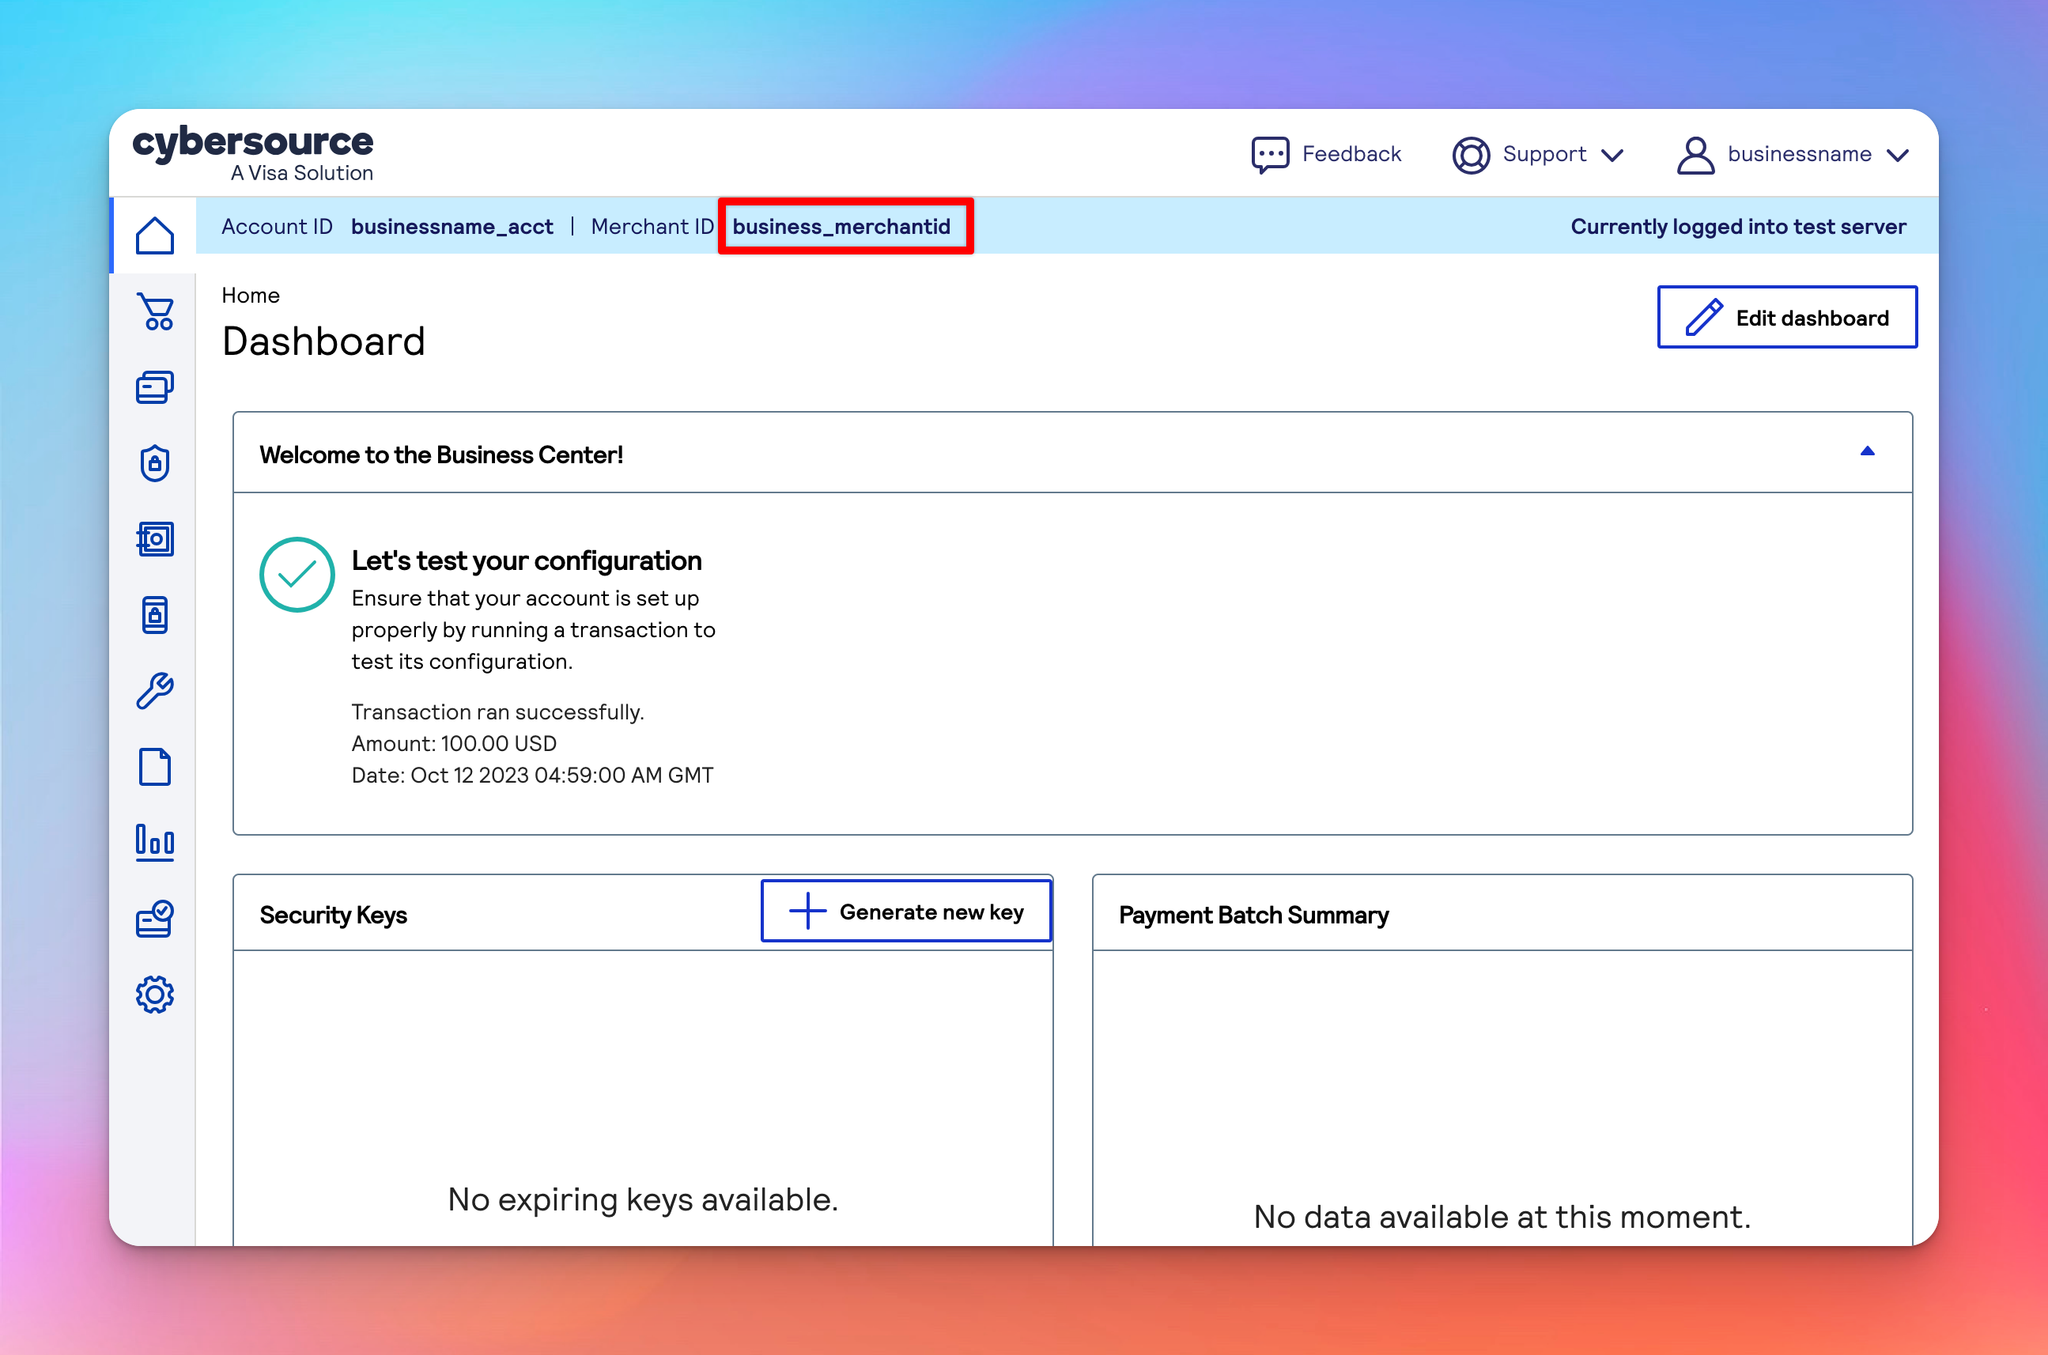
- Enter your Merchant ID - you can find this in your Cybersource account area.
Example: business_merchantid
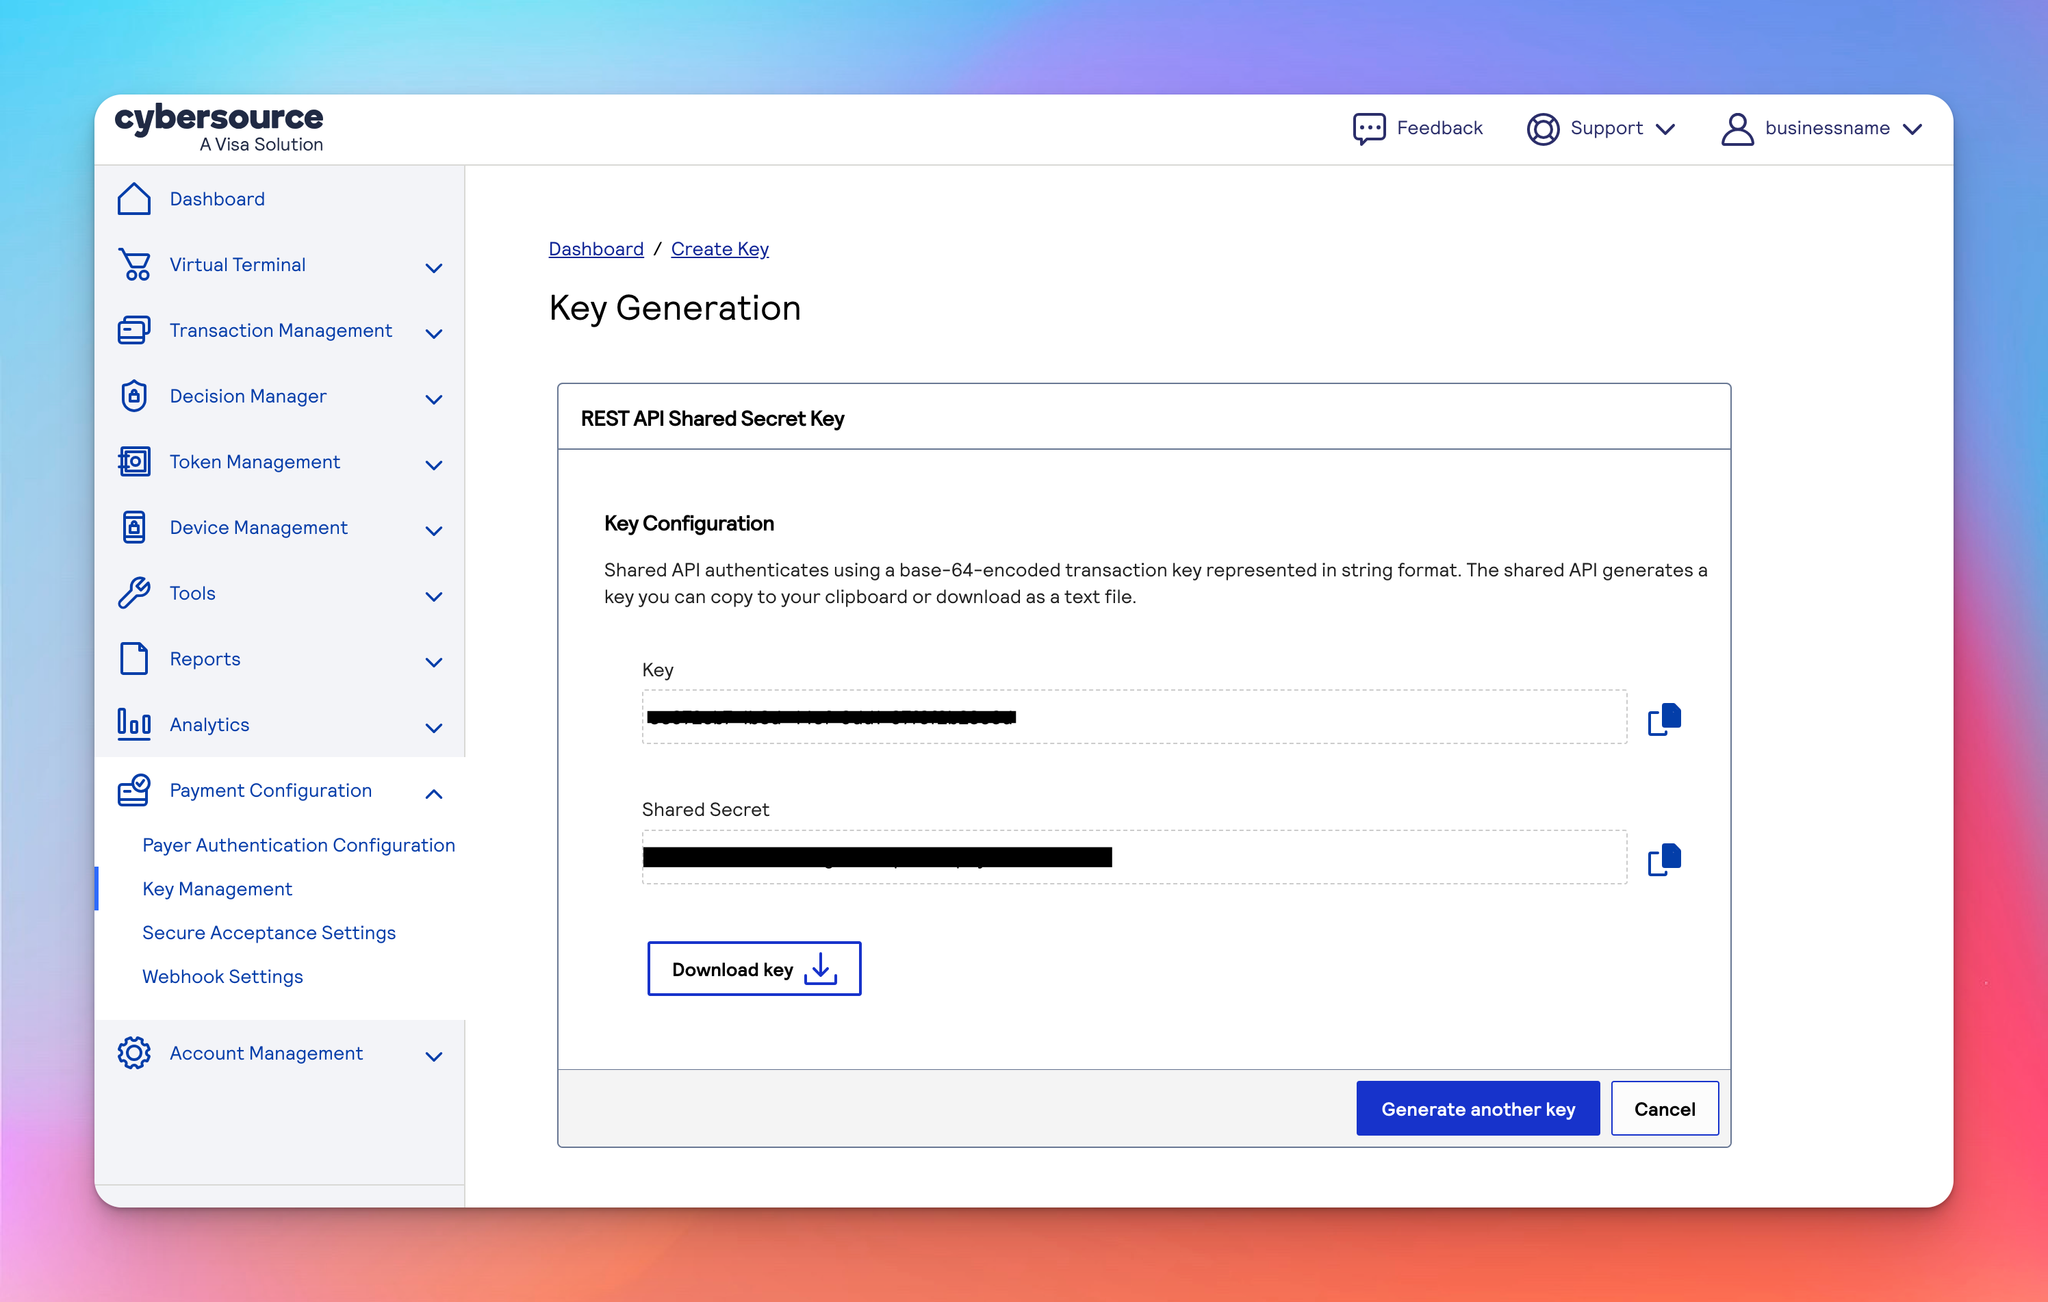
- Enter the Merchant Key ID - you can find this in your Cybersource account area.
Example: 24152274-2a42-45cb-7ea4-7ef50e4494ff
- Enter the Merchant Secret Key - you can find this in your Cybersource account area.
Example: p9JgDst+BgXeVeKte+uFFju7hqU+OQLyvoH75iWdUEk=
- Click Save
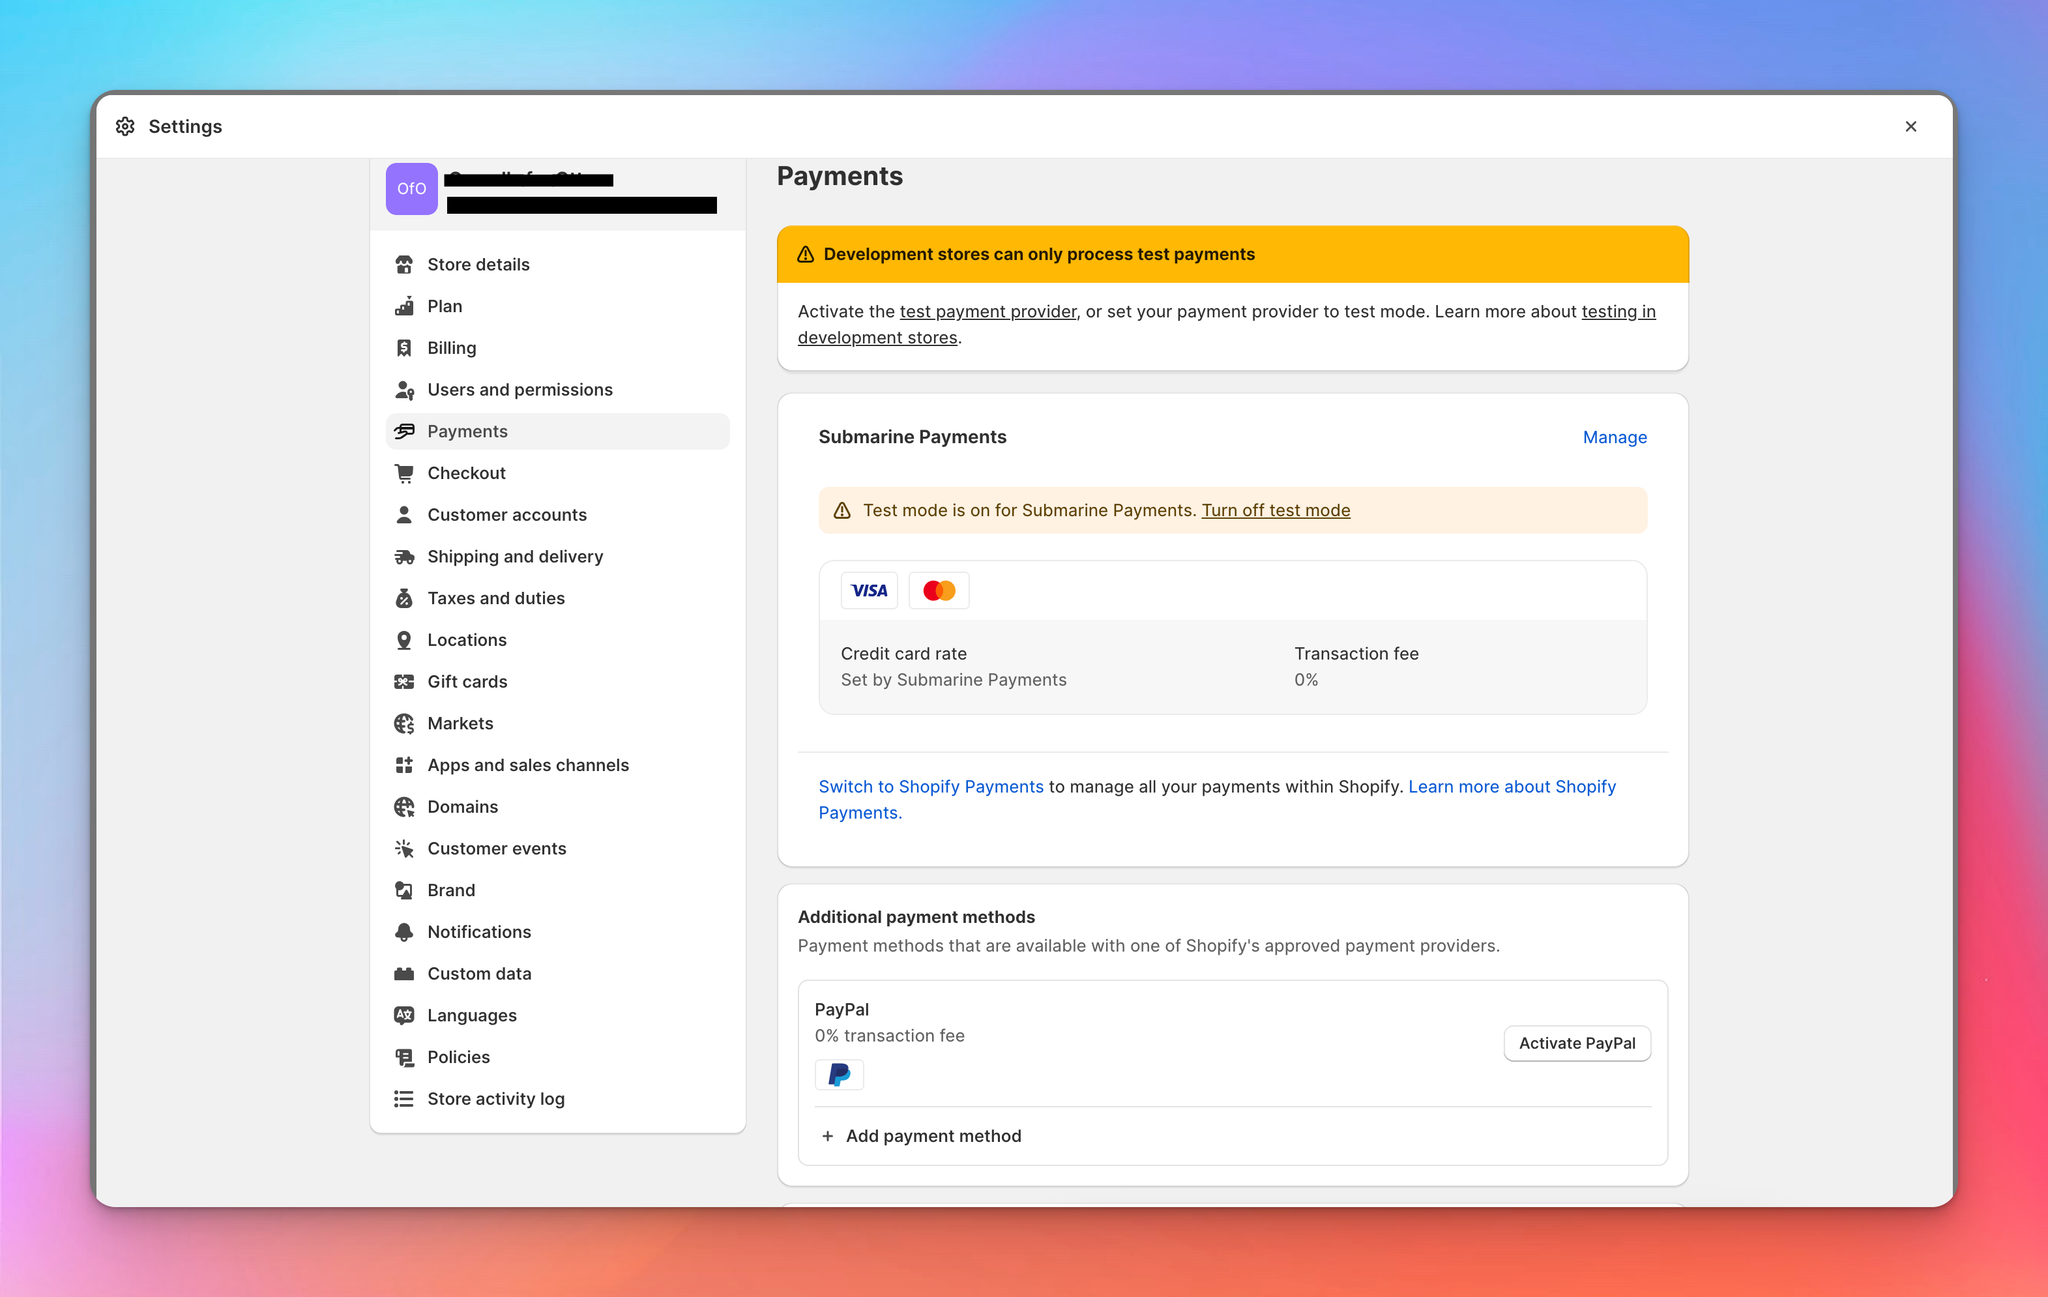
- Add Submarine Payments as a Payment method in your Shopify Settings area

- To test with staging credentials you can place an order via the Online store using one of the Cybersource Test cards
Note: Please ensure the currency of your Shopify store matches your Cybersource merchant account currency. If your Cybersource account does not support the store currency then the payments will fail at checkout.
If you're using Submarine Payments in a staging store, please ensure that Test mode is turned ON in the Shopify payment settings.
API Access
Please refer to the specific use case guide your PM has provided you for the correct API endpoints.
If you're using Submarine Payments in a staging store, please ensure that Test mode is turned ON in the Shopify payment settings.
