Submarine integrates with Shopify Flow, allowing merchants to connect Submarine with their existing systems and use Flow to create customised workflows without any extra hassle. As a Klaviyo partner and many of our existing merchants using Klaviyo for customer email templates, we have made it as easy as we can for getting new notifications setup and sending from Klaviyo.
1.1 Available Flows for Submarine Platform
Submarine has a selection of available flows that merchants can leverage to either communicate with customers or create operation workflows.
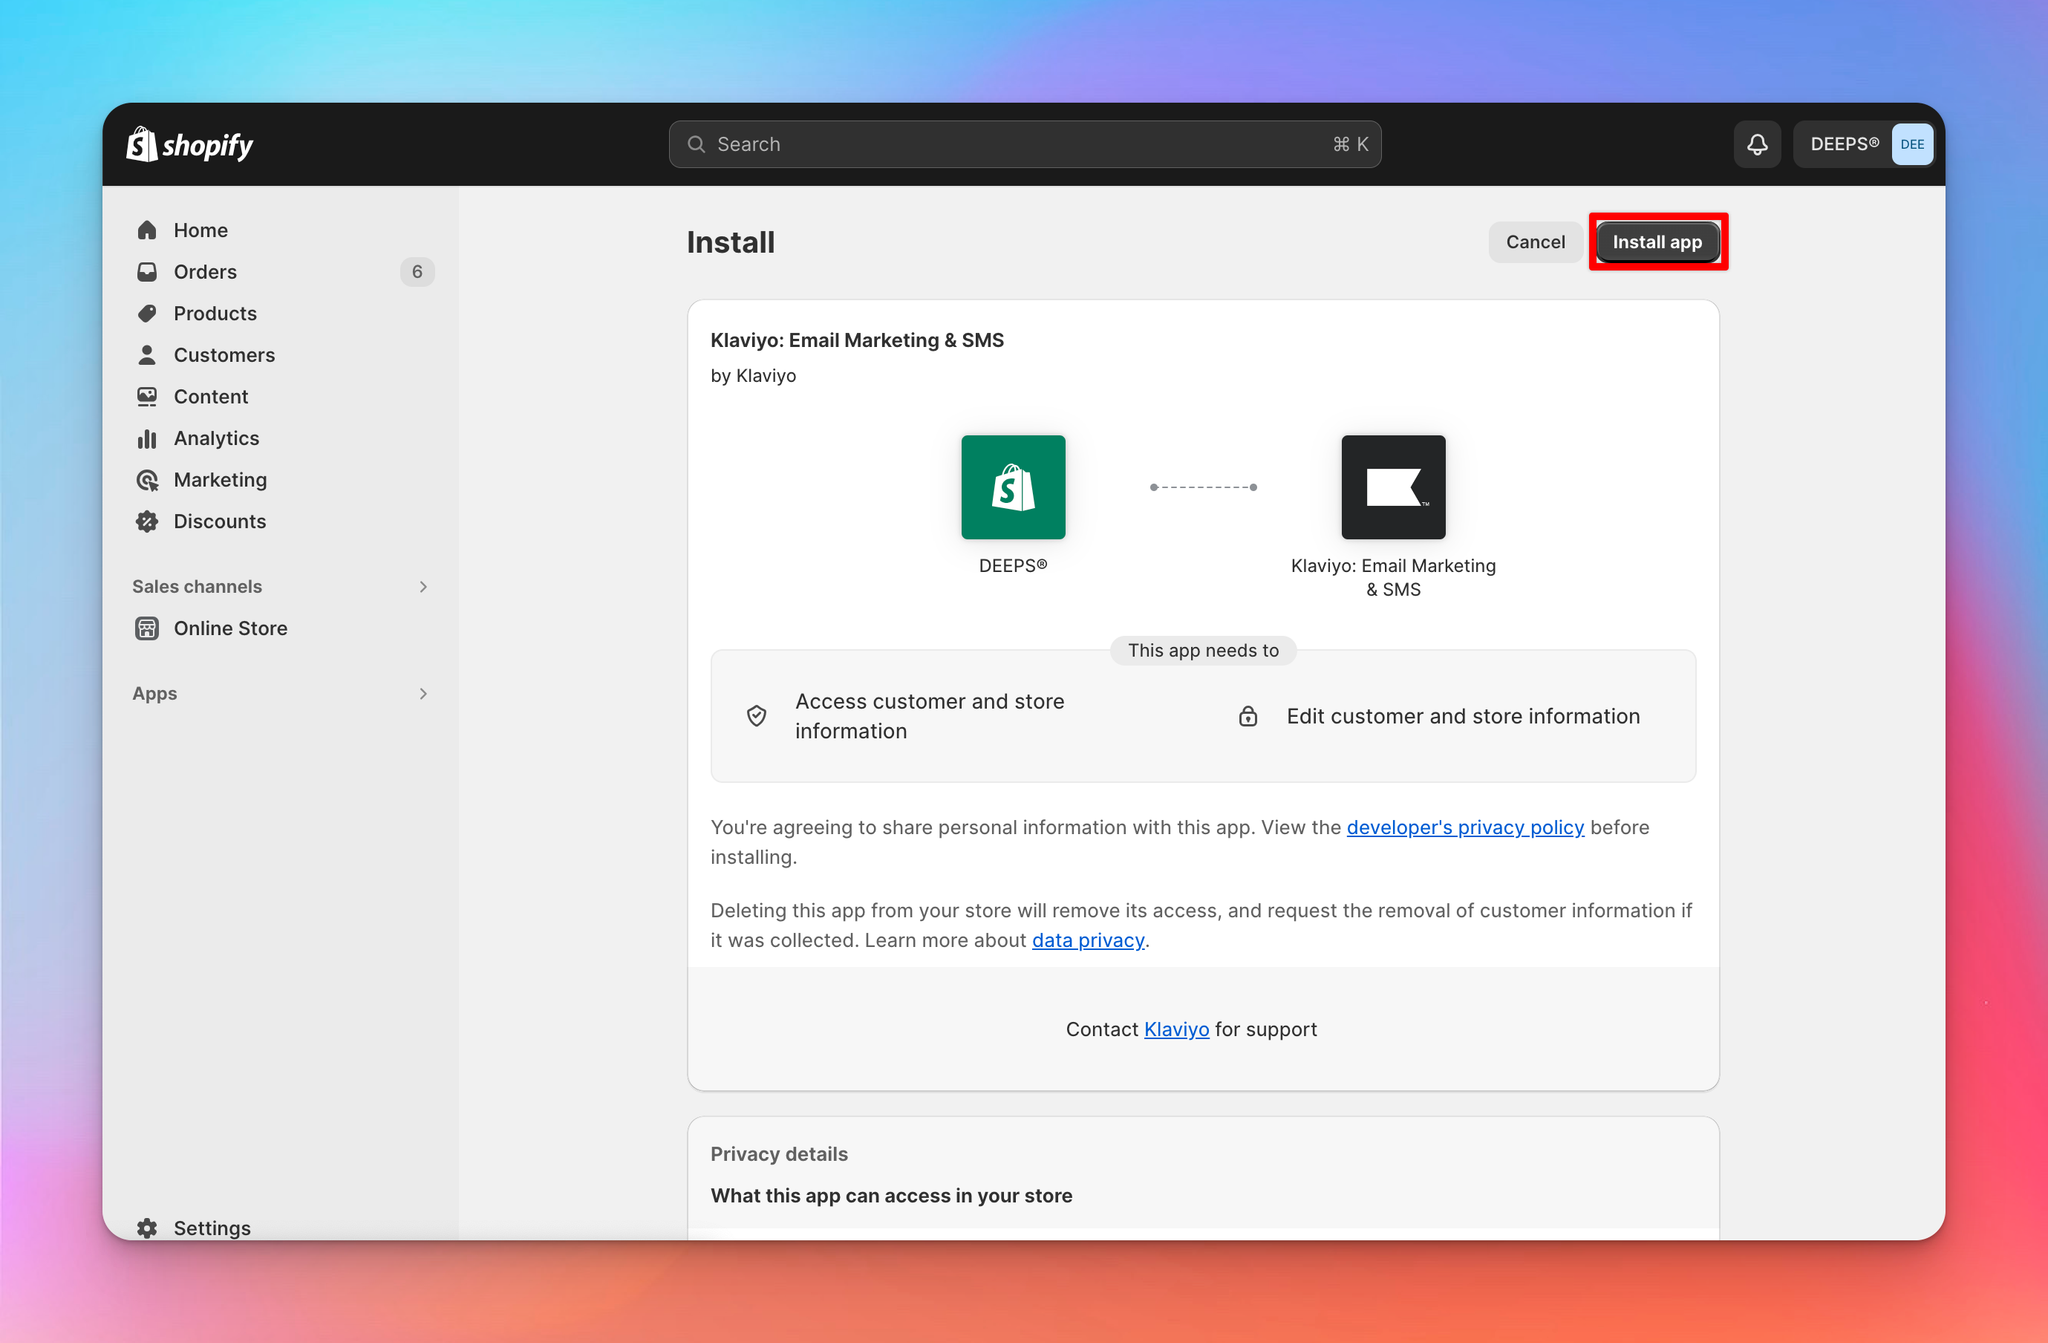
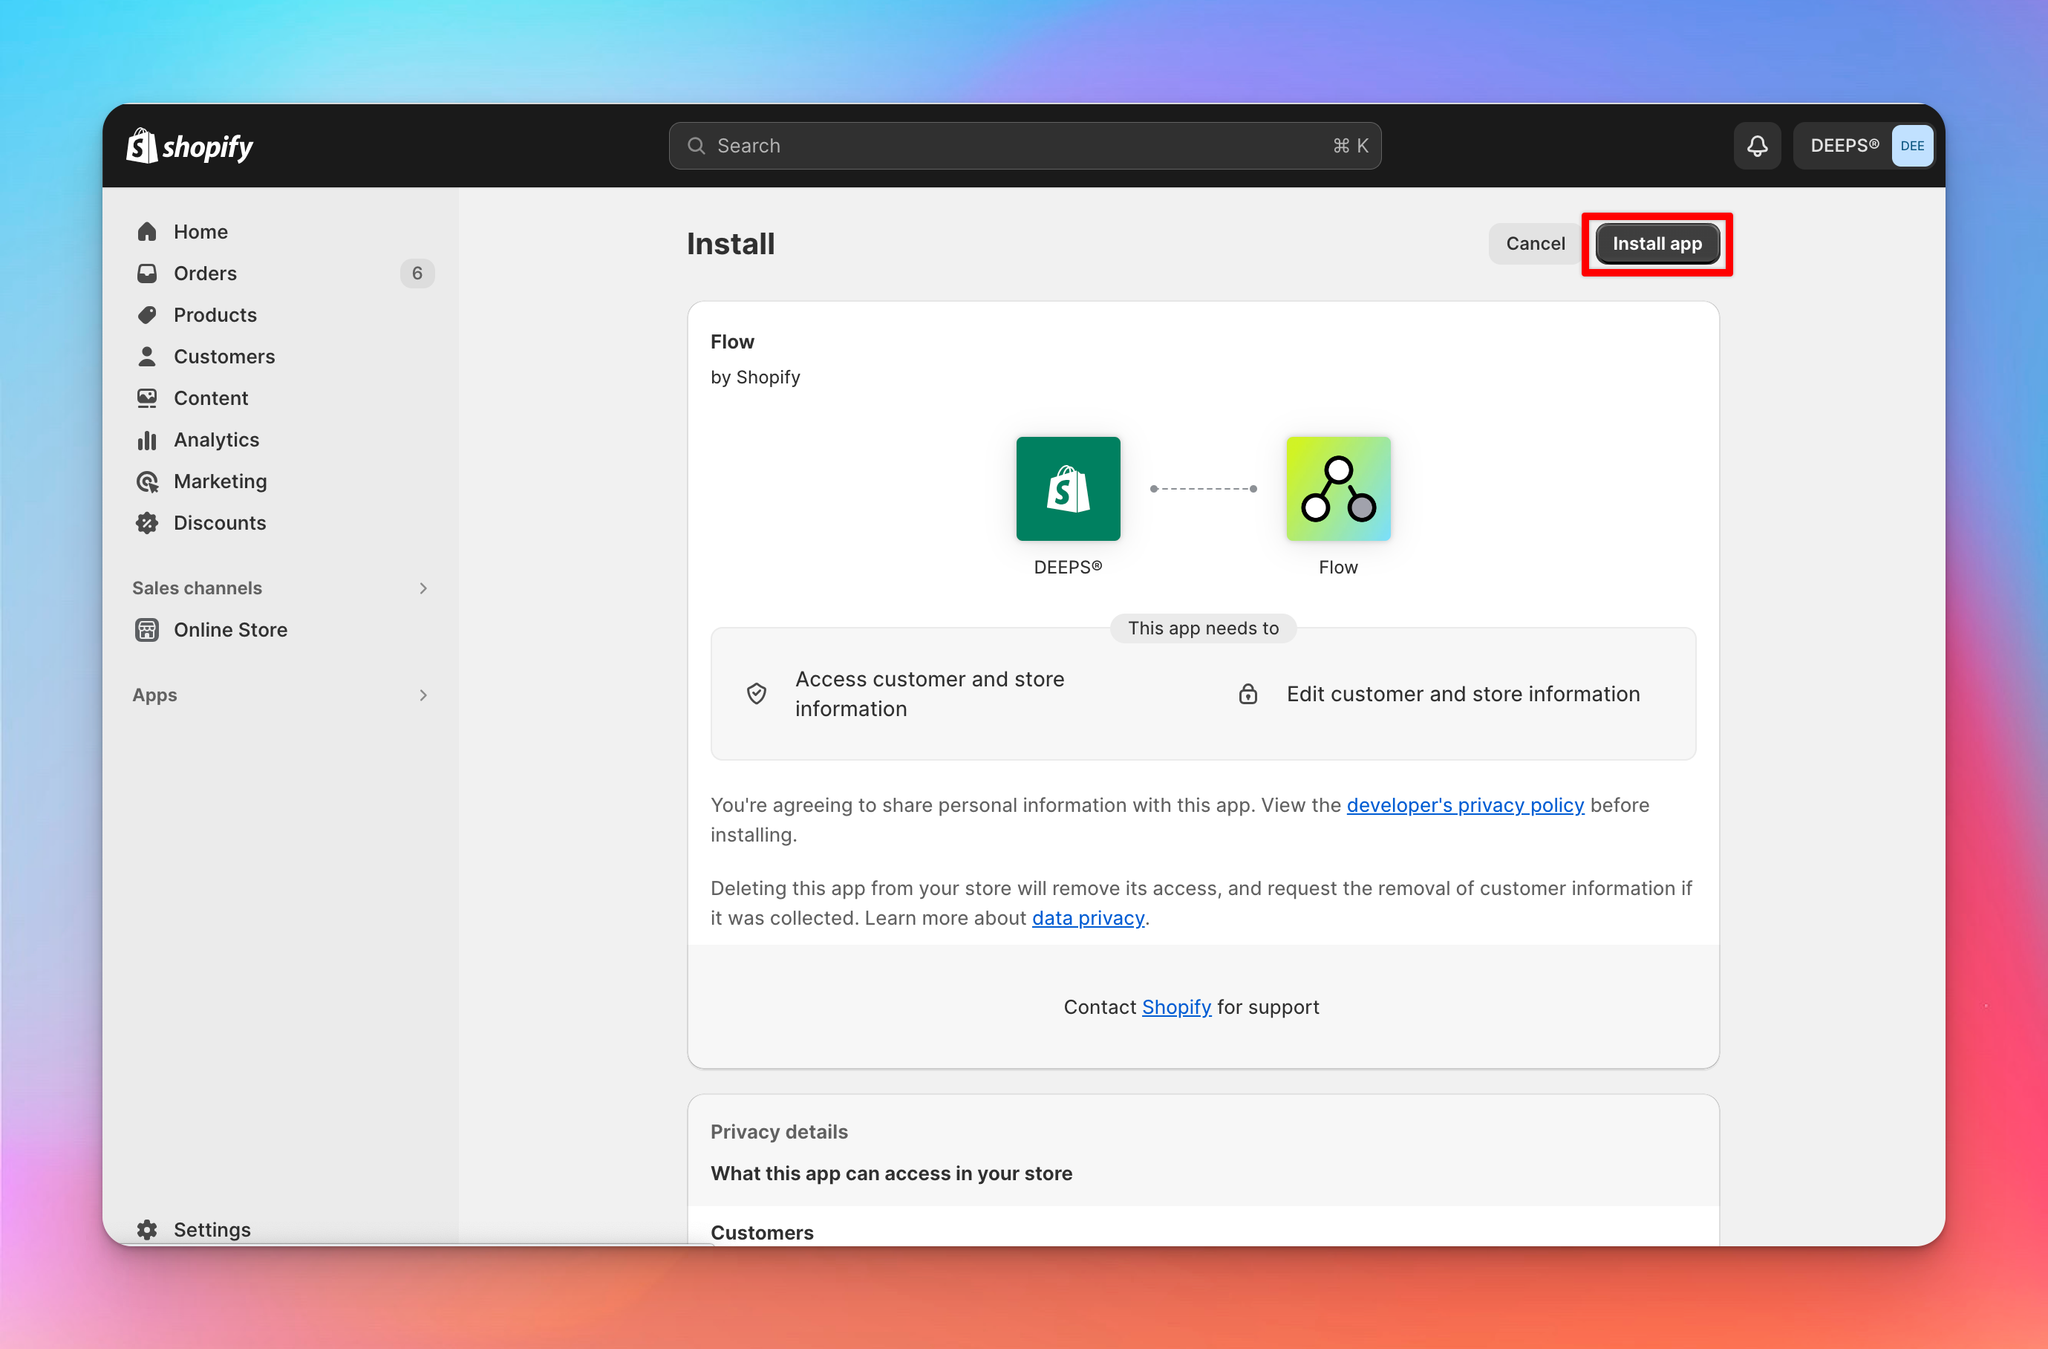
You’ll be redirected to this page, and click ‘install’, top right.
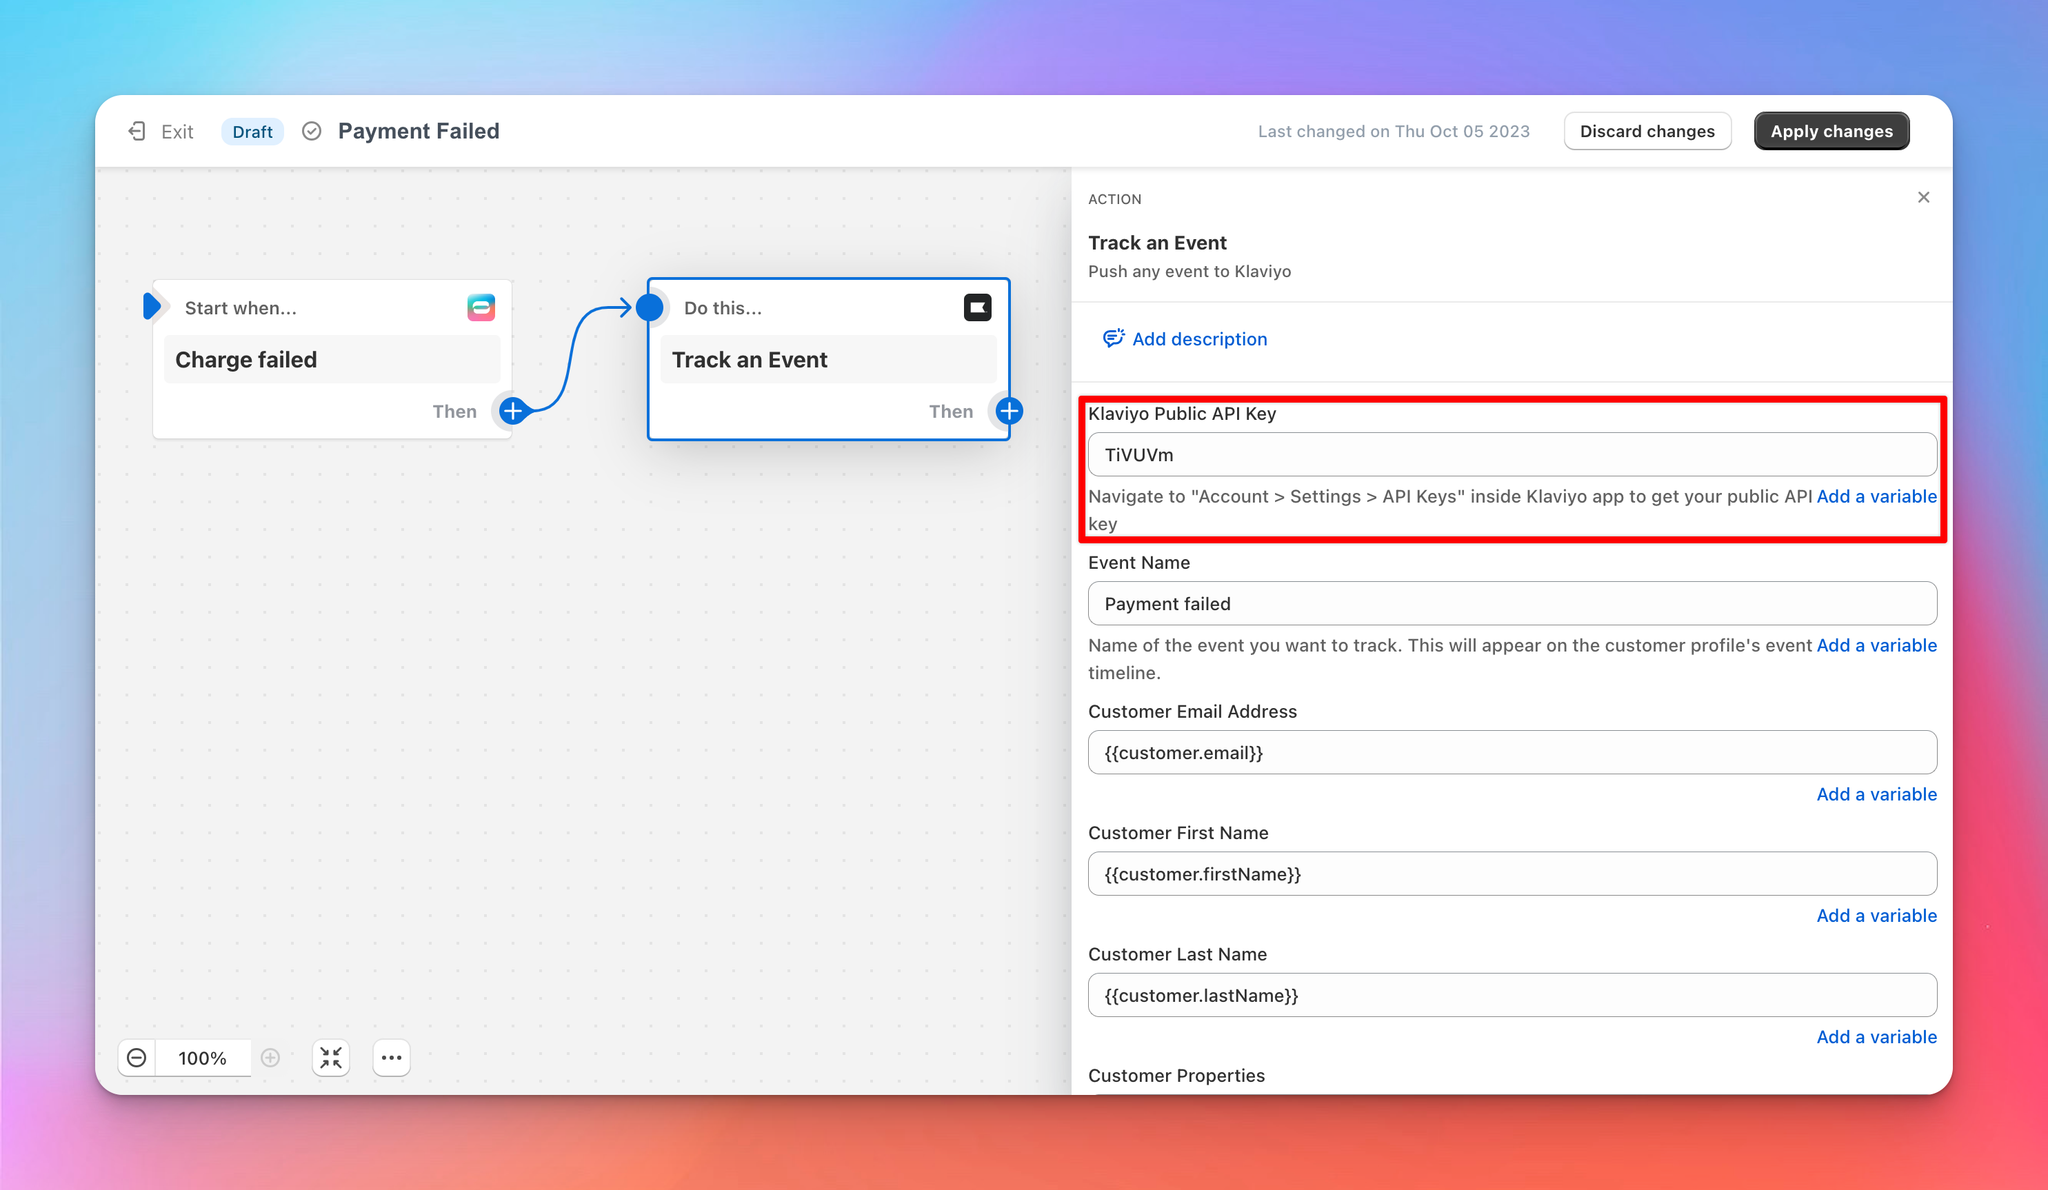
3. Setting up a workflow to Track an event in Klaviyo
You’re now ready to setup your first Shopify Flow to Track an Event in Klaviyo. These events will get sent across to Klaviyo and can be used to add customer properties or in Flows to email customers.
To setup a new flow you can start from scratch or import our boilerplate flows below, we would recommend importing at least one of our boilerplates so you can see the structure of the payload you need to send.
3.1 Option 1: Setup a workflow from scratch
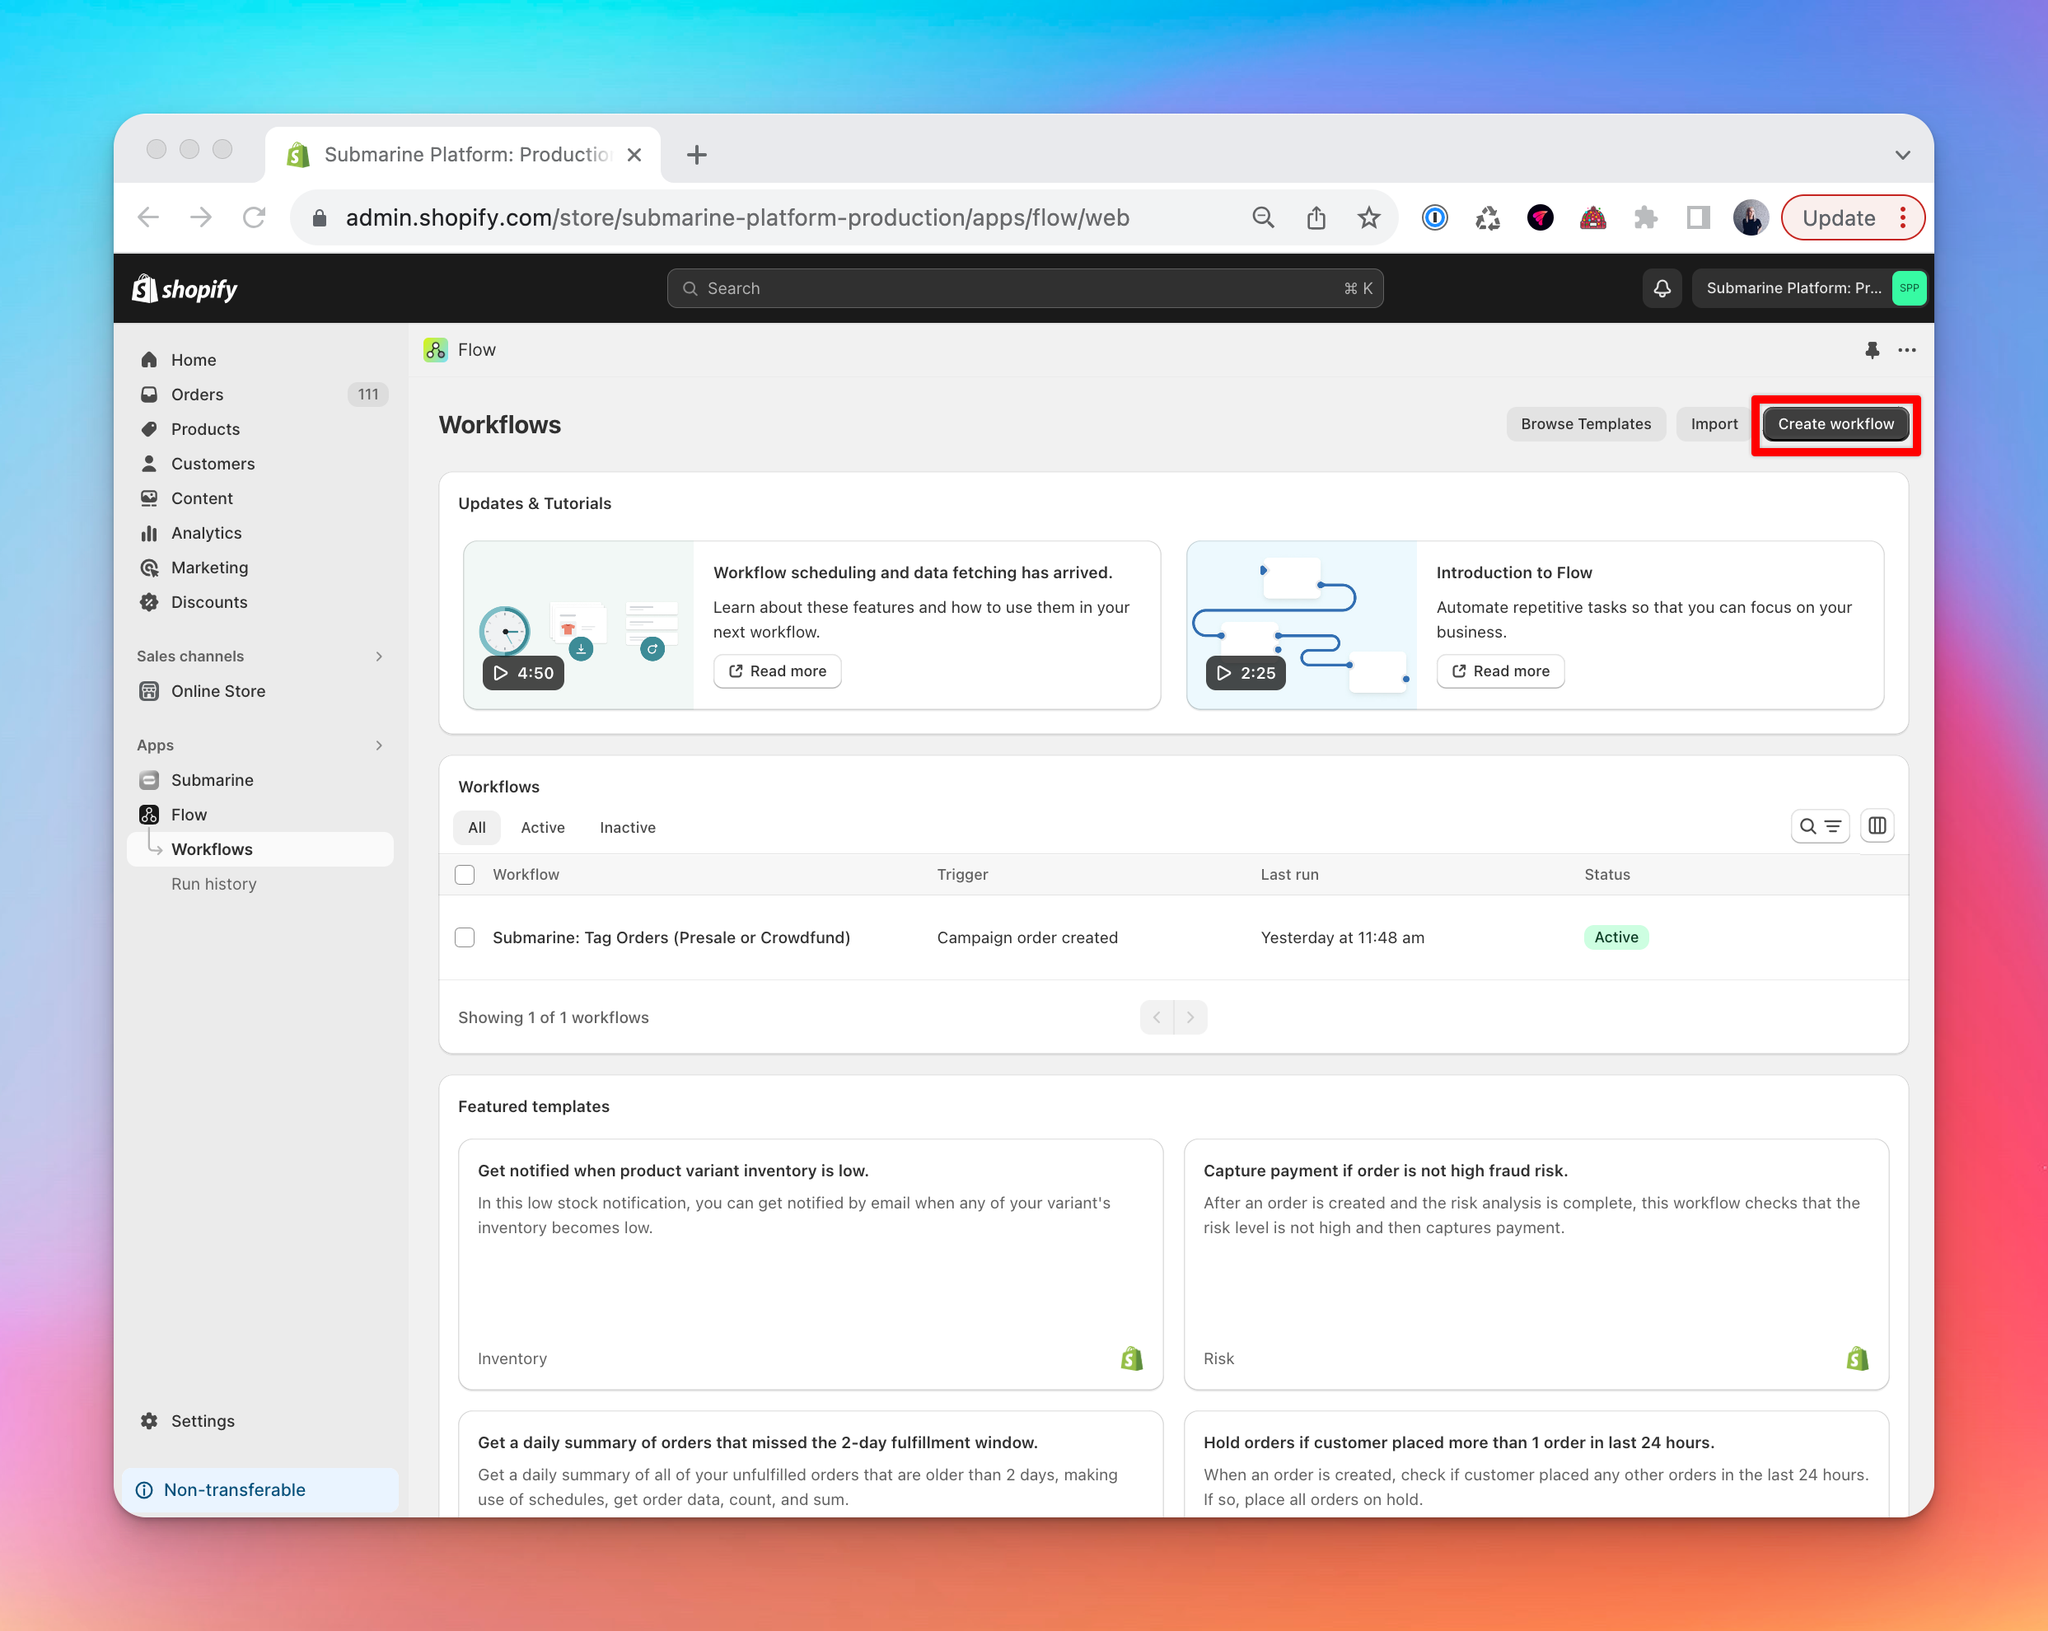
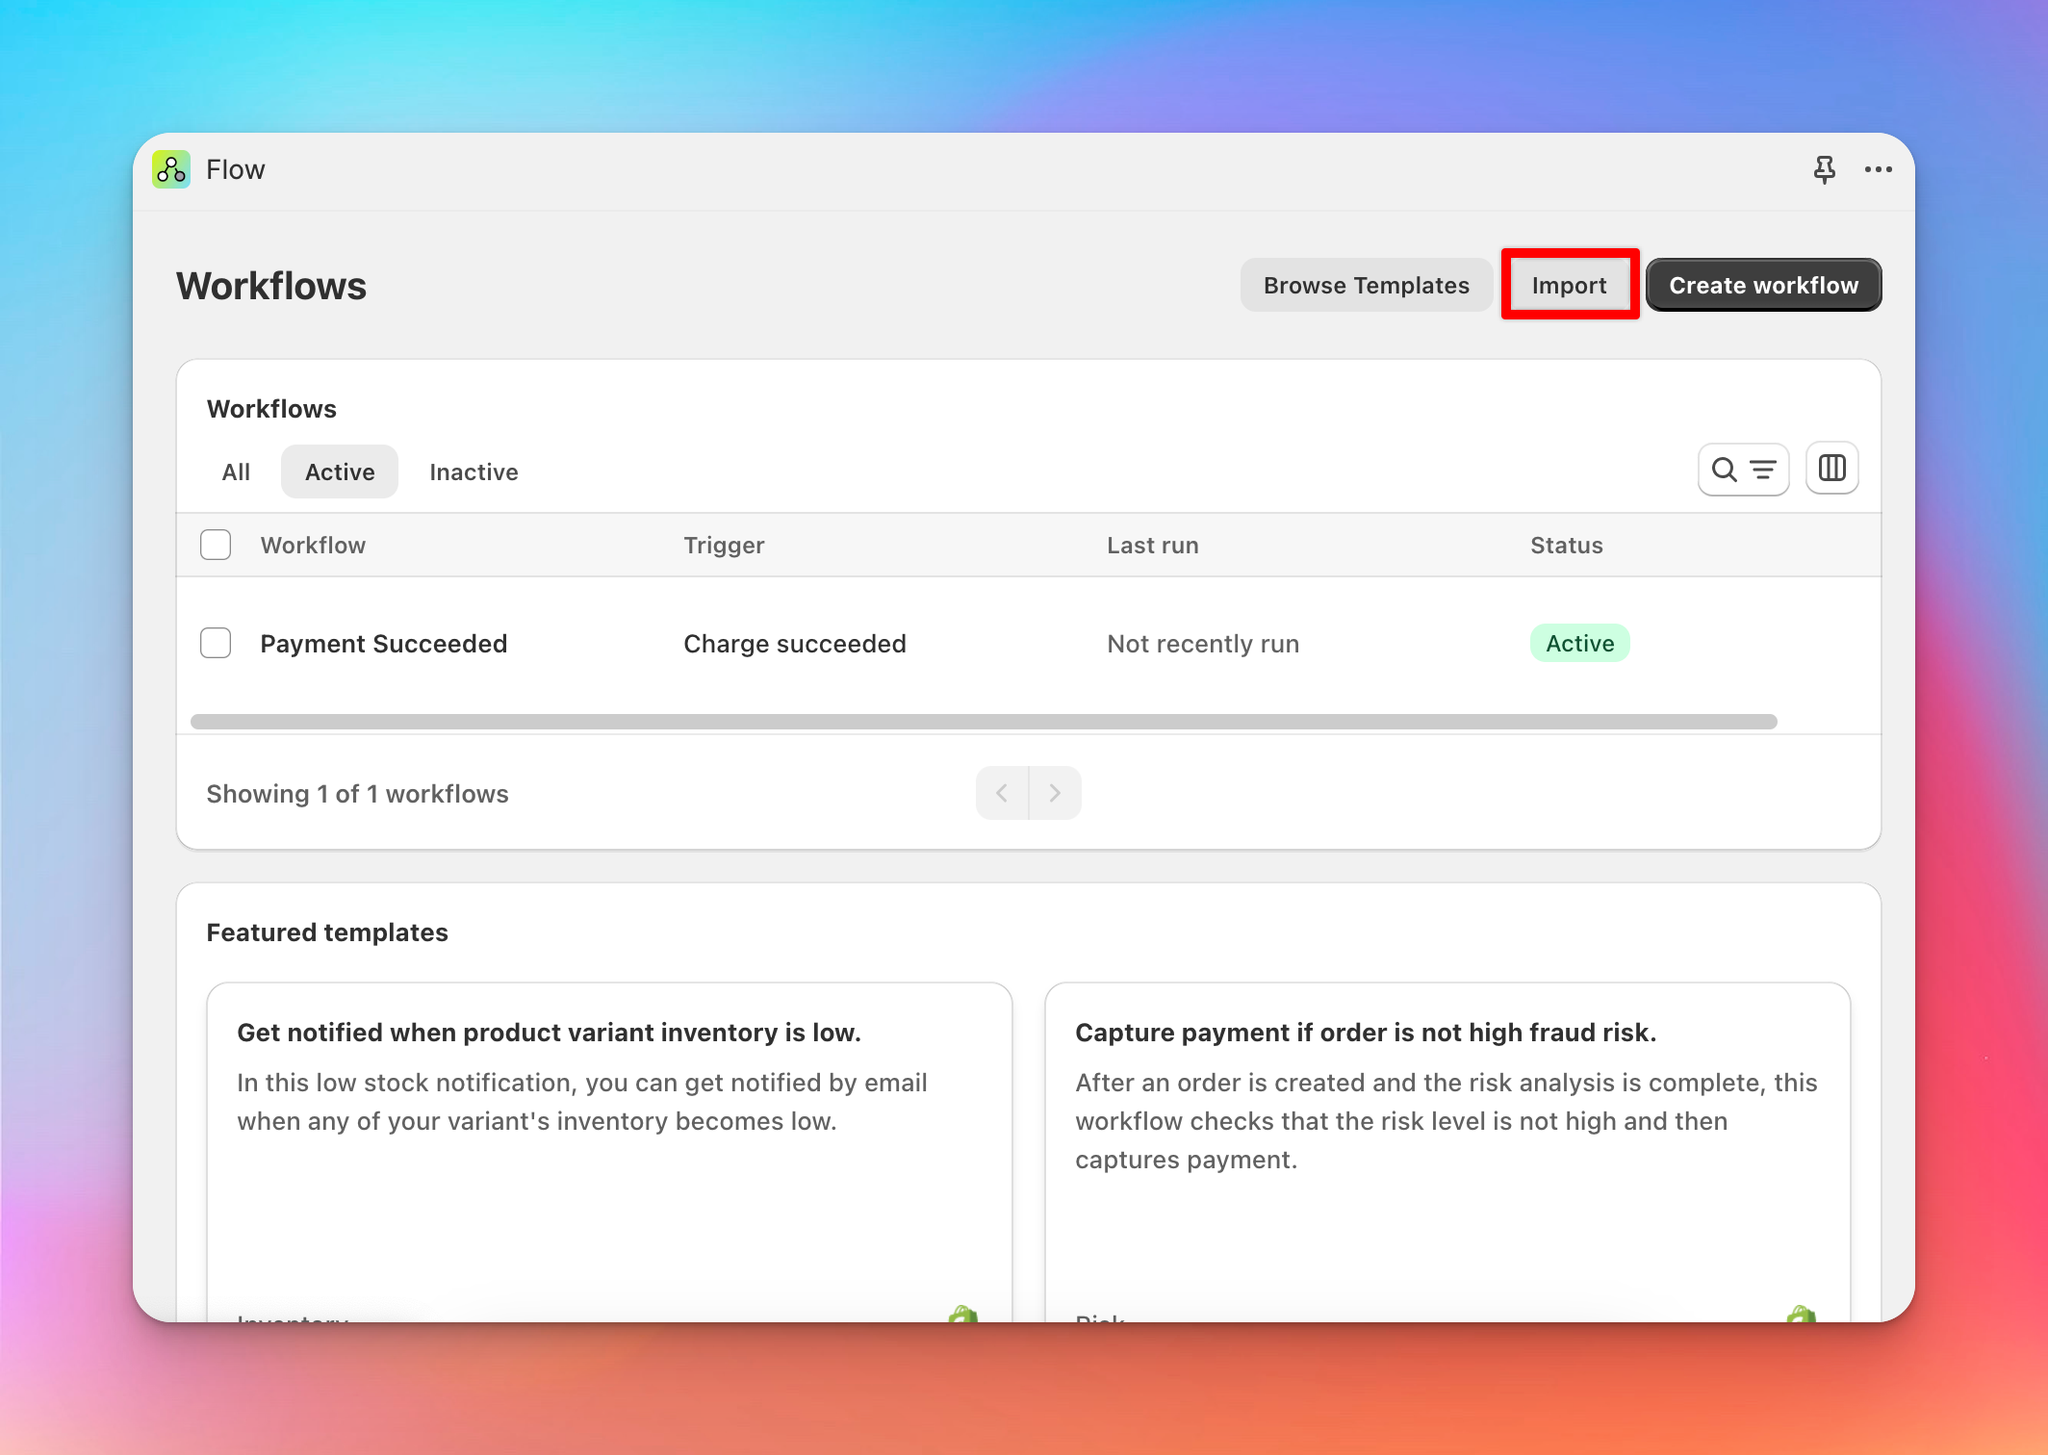
Step 1. Once you’ve installed the Shopify Flow and the Klaviyo app on your store. Open Flow and locate the ‘Create workflow’ button in the top right.
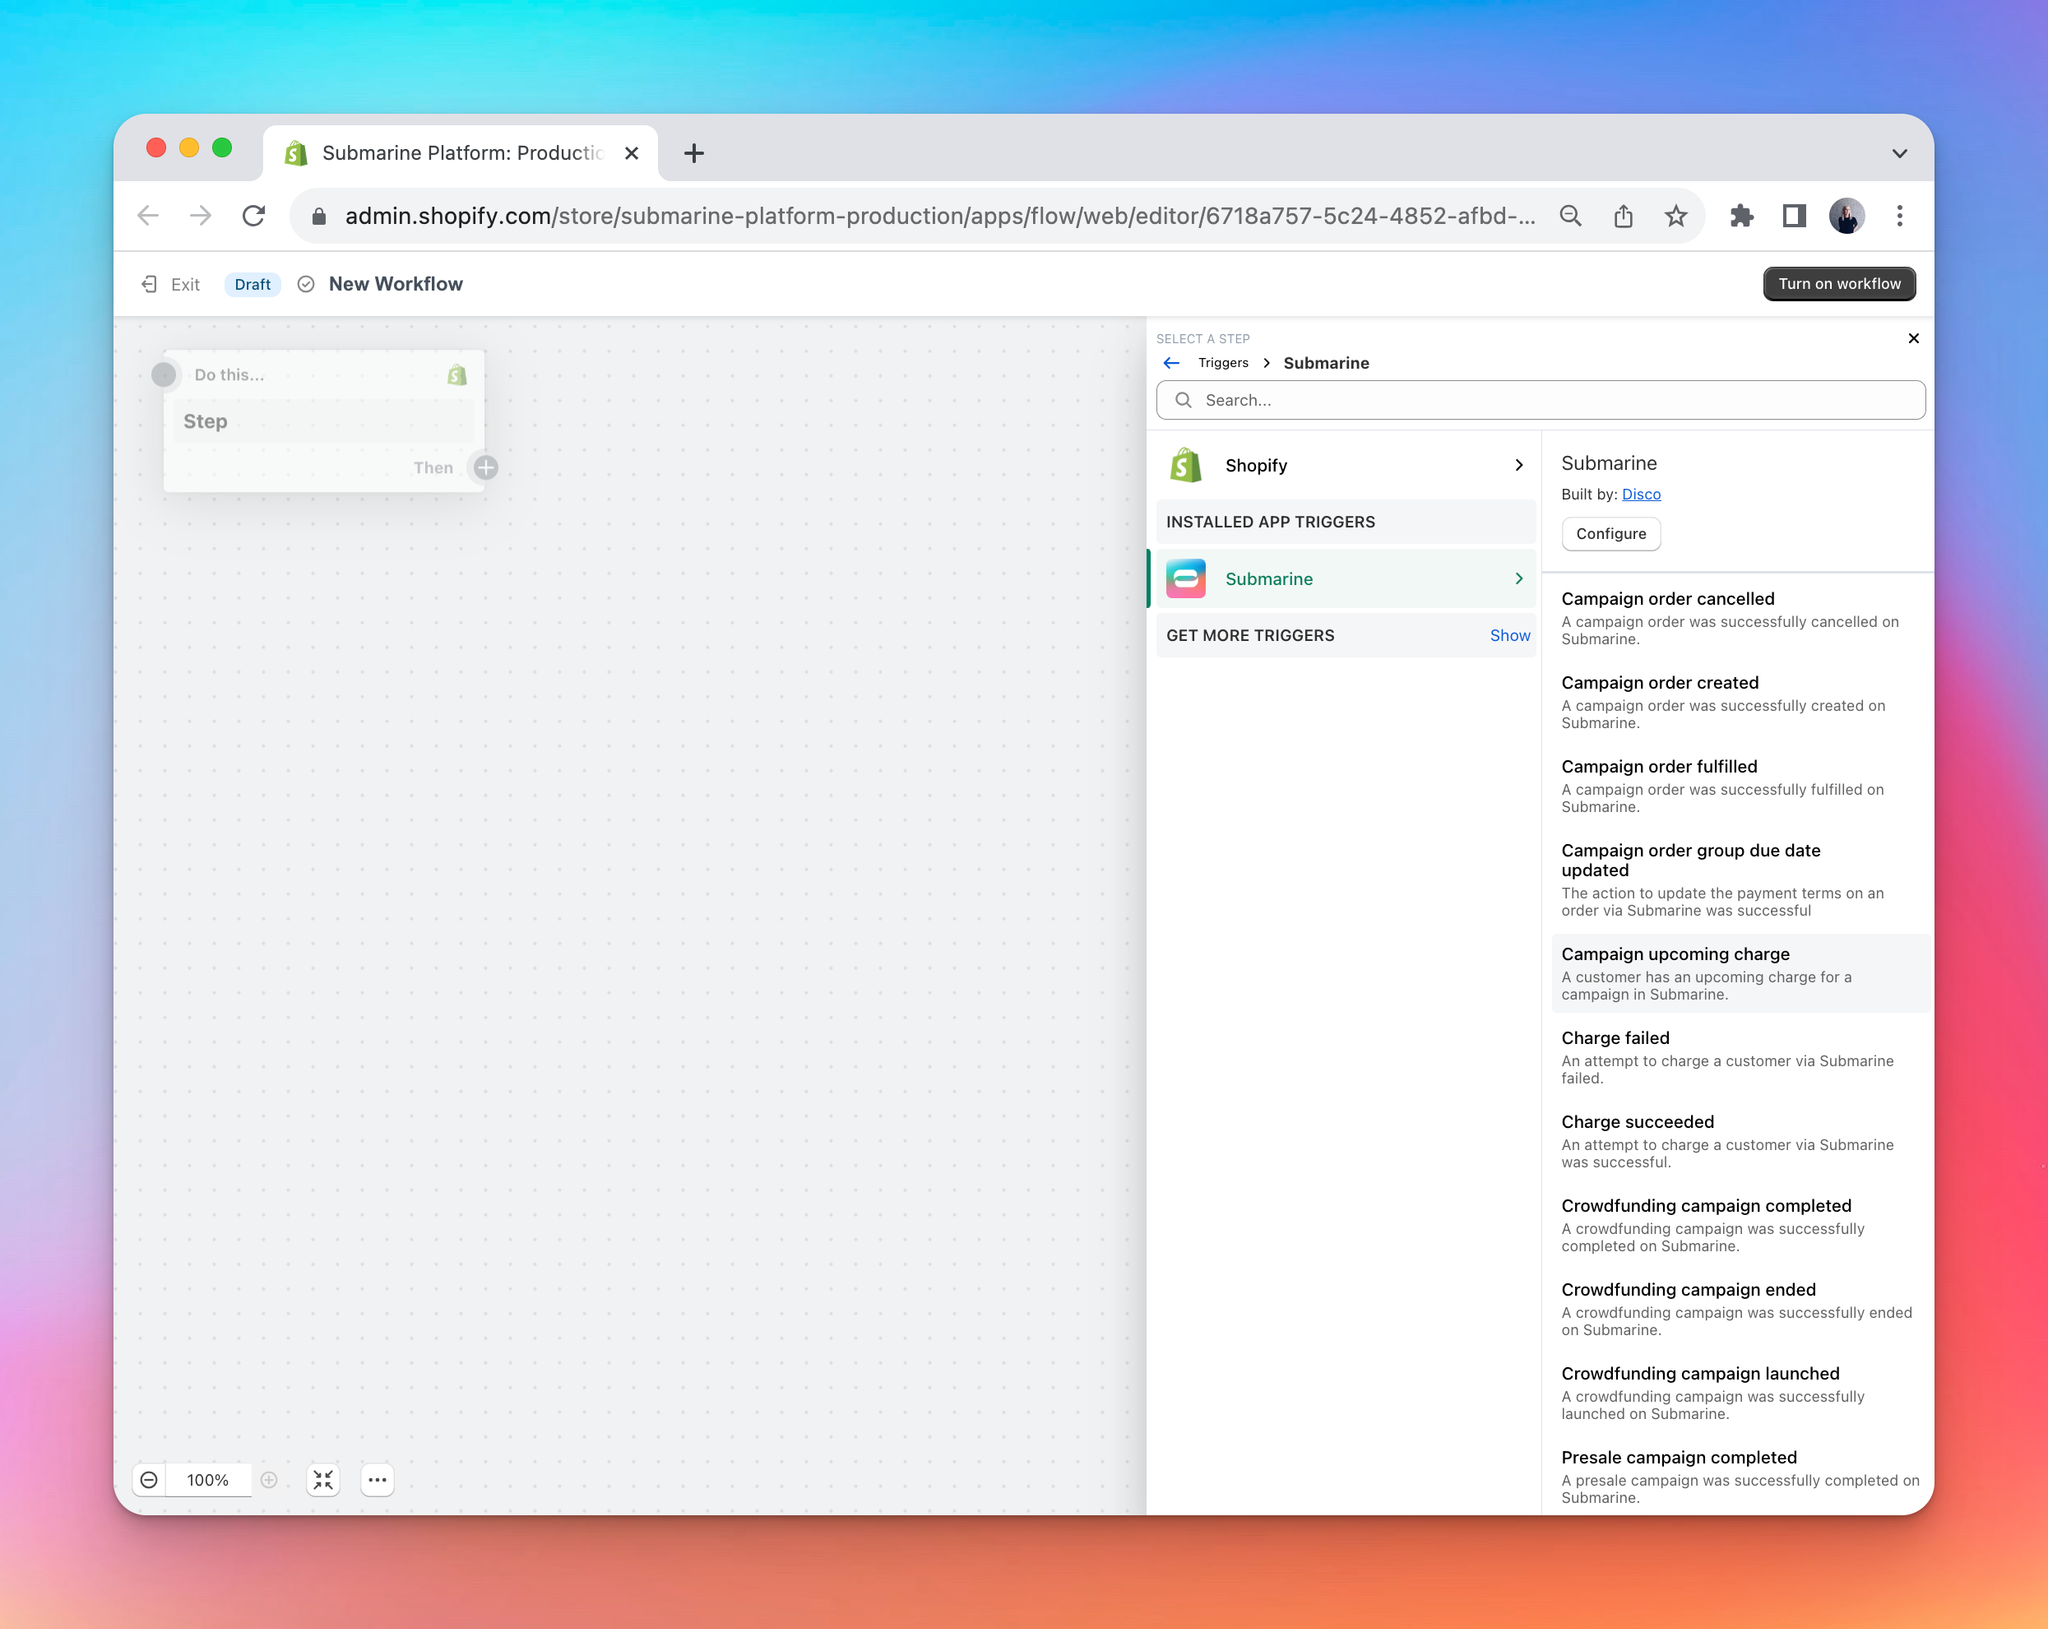
Step2. Click on Submarine and you will see the range of Flow triggers we have available for to use.
We’ll use ‘Campaign charged failed’ as an example to setup.
Select Submarine > Campaign charged failed as the trigger.
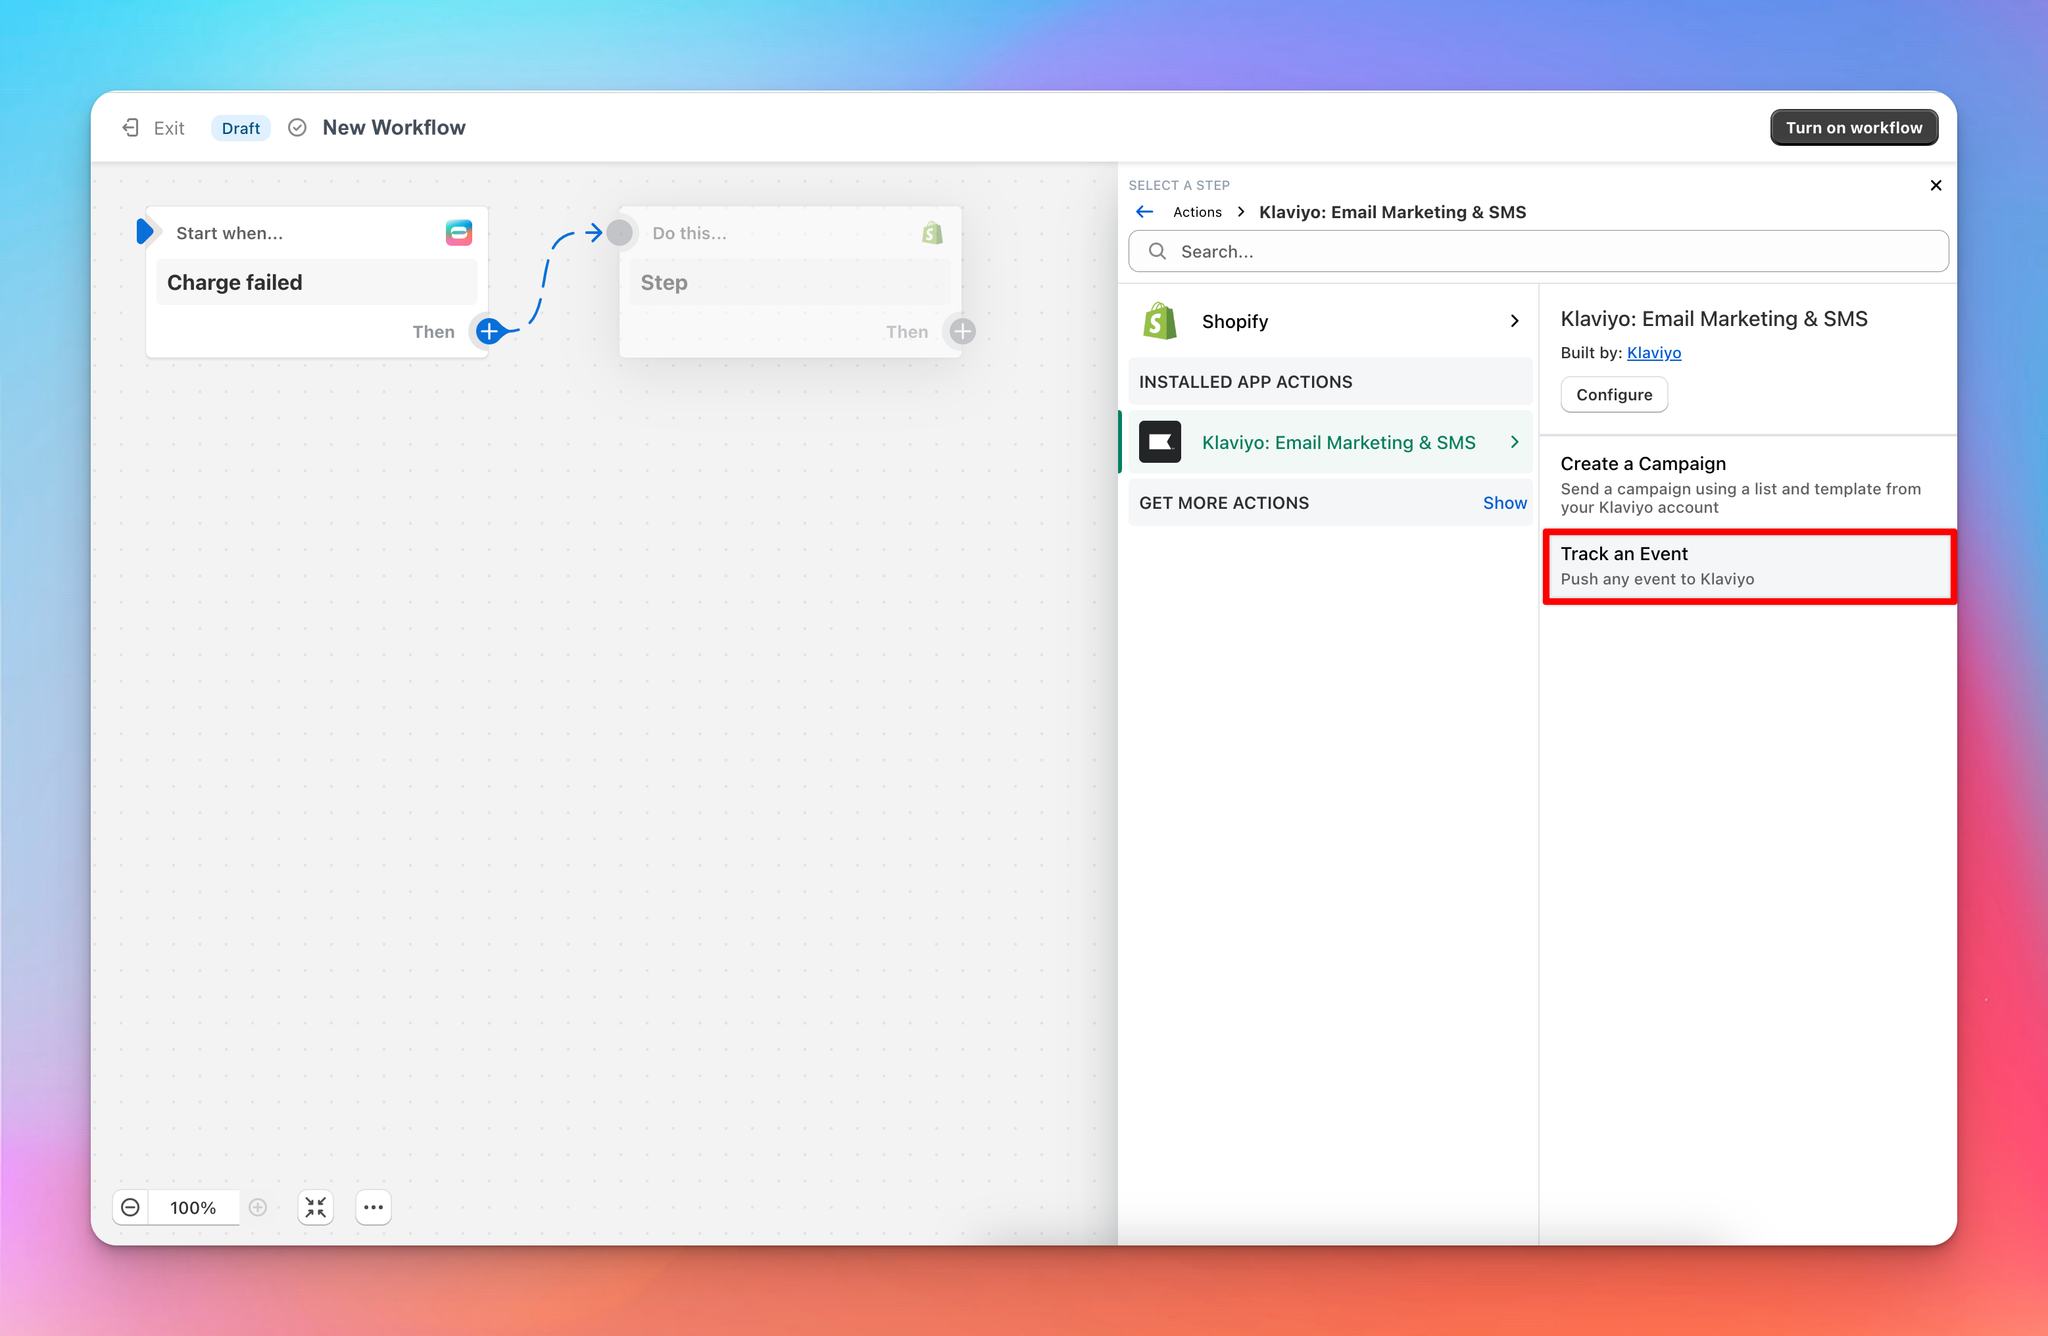
Step 3. After you select the trigger you will be asked to select between Condition or Action, if you have no Conditions for sending the trigger then click Action.
Then select the Klaviyo app on the right hand side tab, select ‘Track an event’
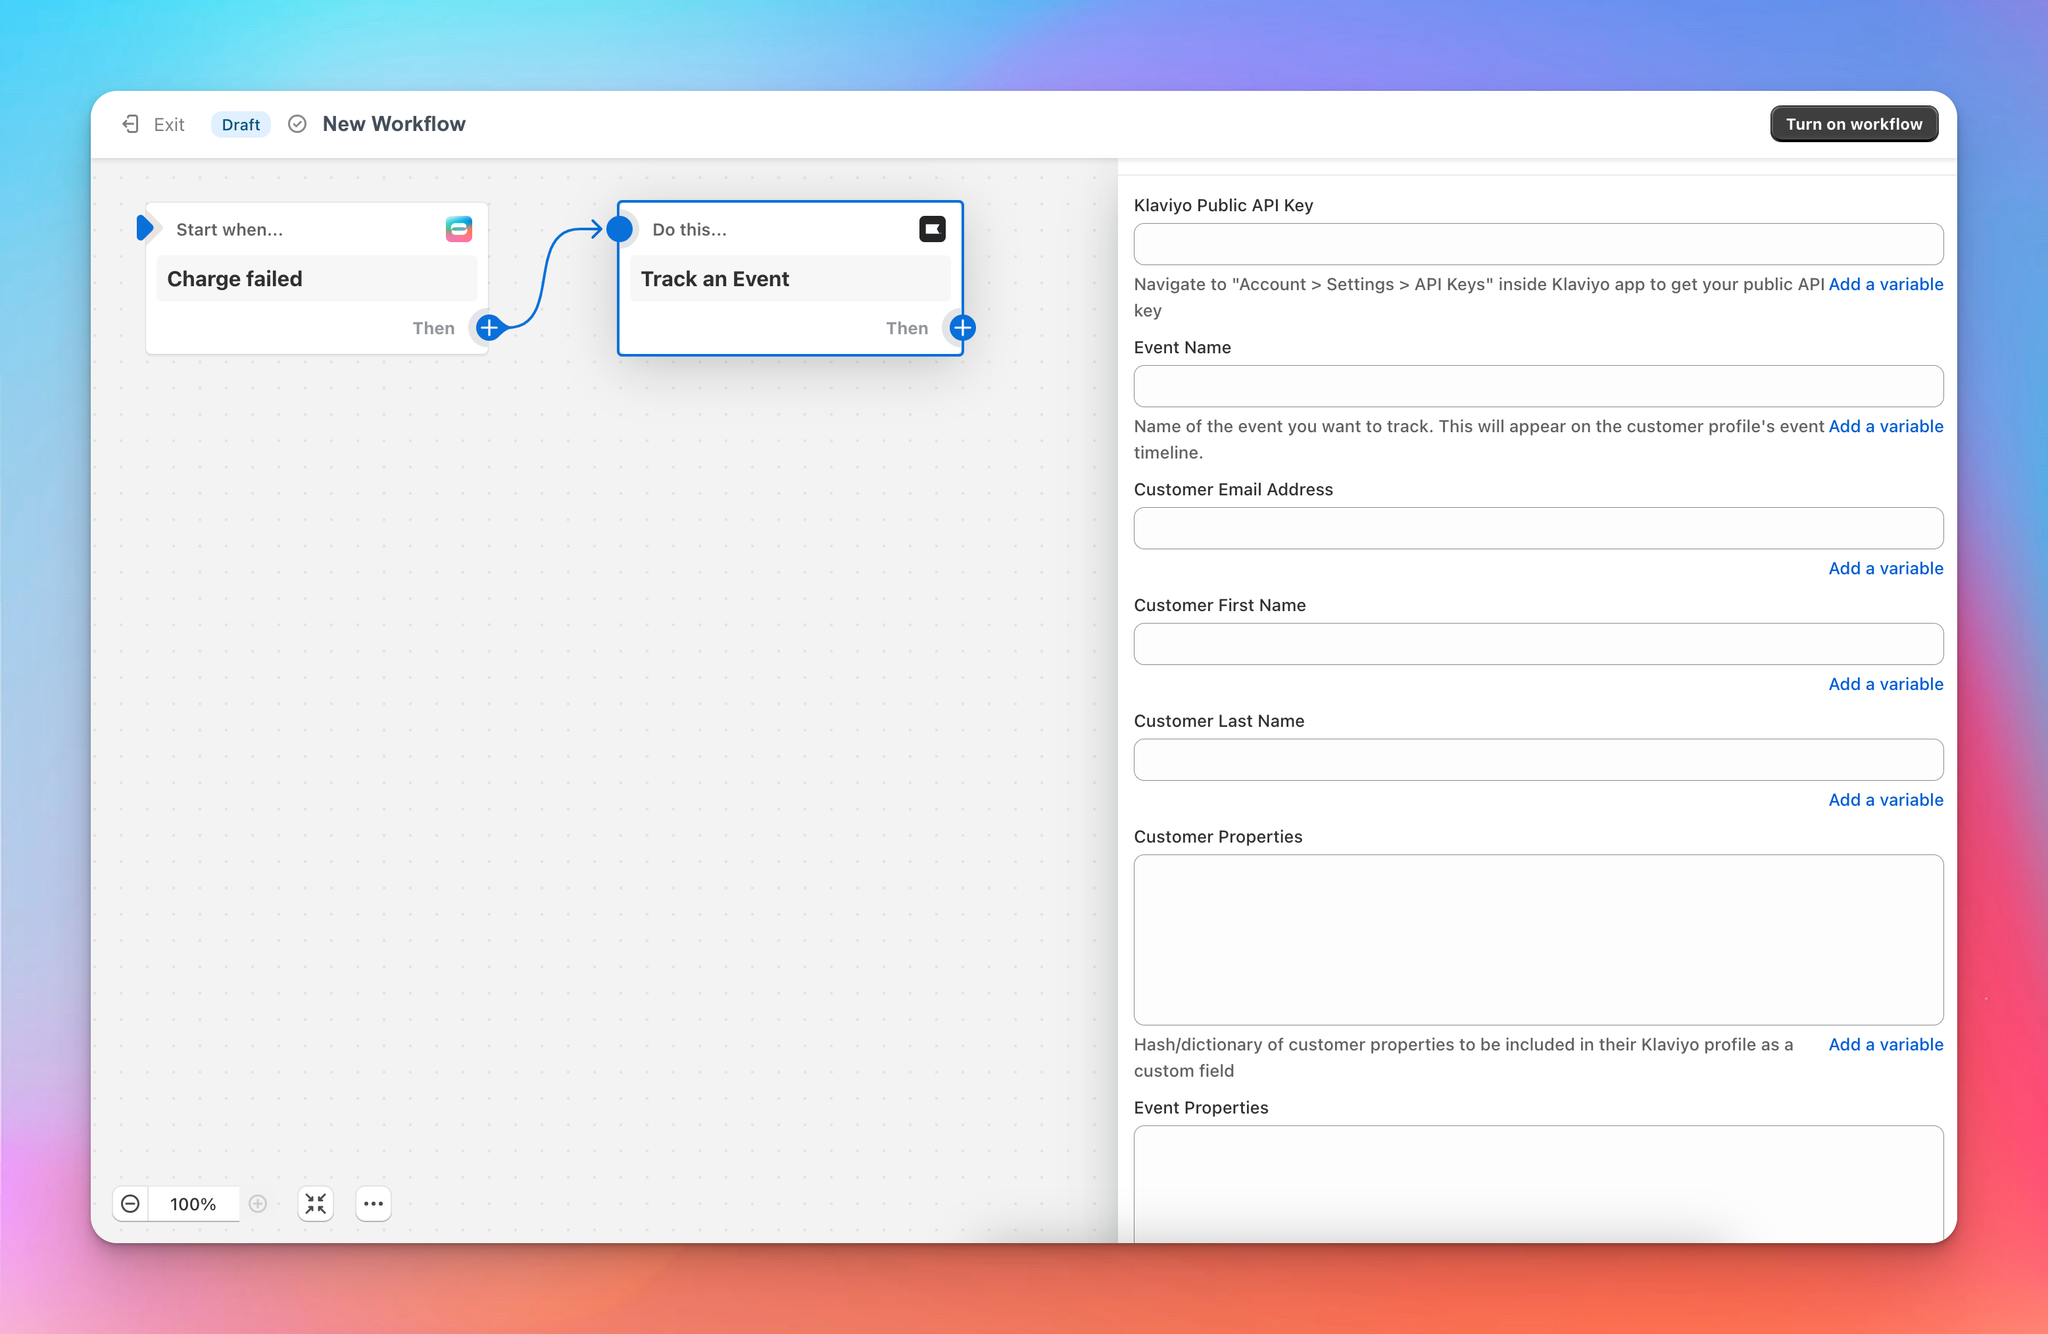
Step 4. The following form will show and you will need to add inputs for each entry so that when the trigger fire it sends that data over to Klaviyo.
🎵
Please note: Flows must always be written in camelCase.
You can populate your form with the follow;
Klaviyo Public API Key: Found in Account > Settings > API keys
Event name: Whichever event you are wanting to track. Different events can be found here
For this example will be doing Upcoming preorder charge
Step 5: Select the files you downloaded in Step 3.
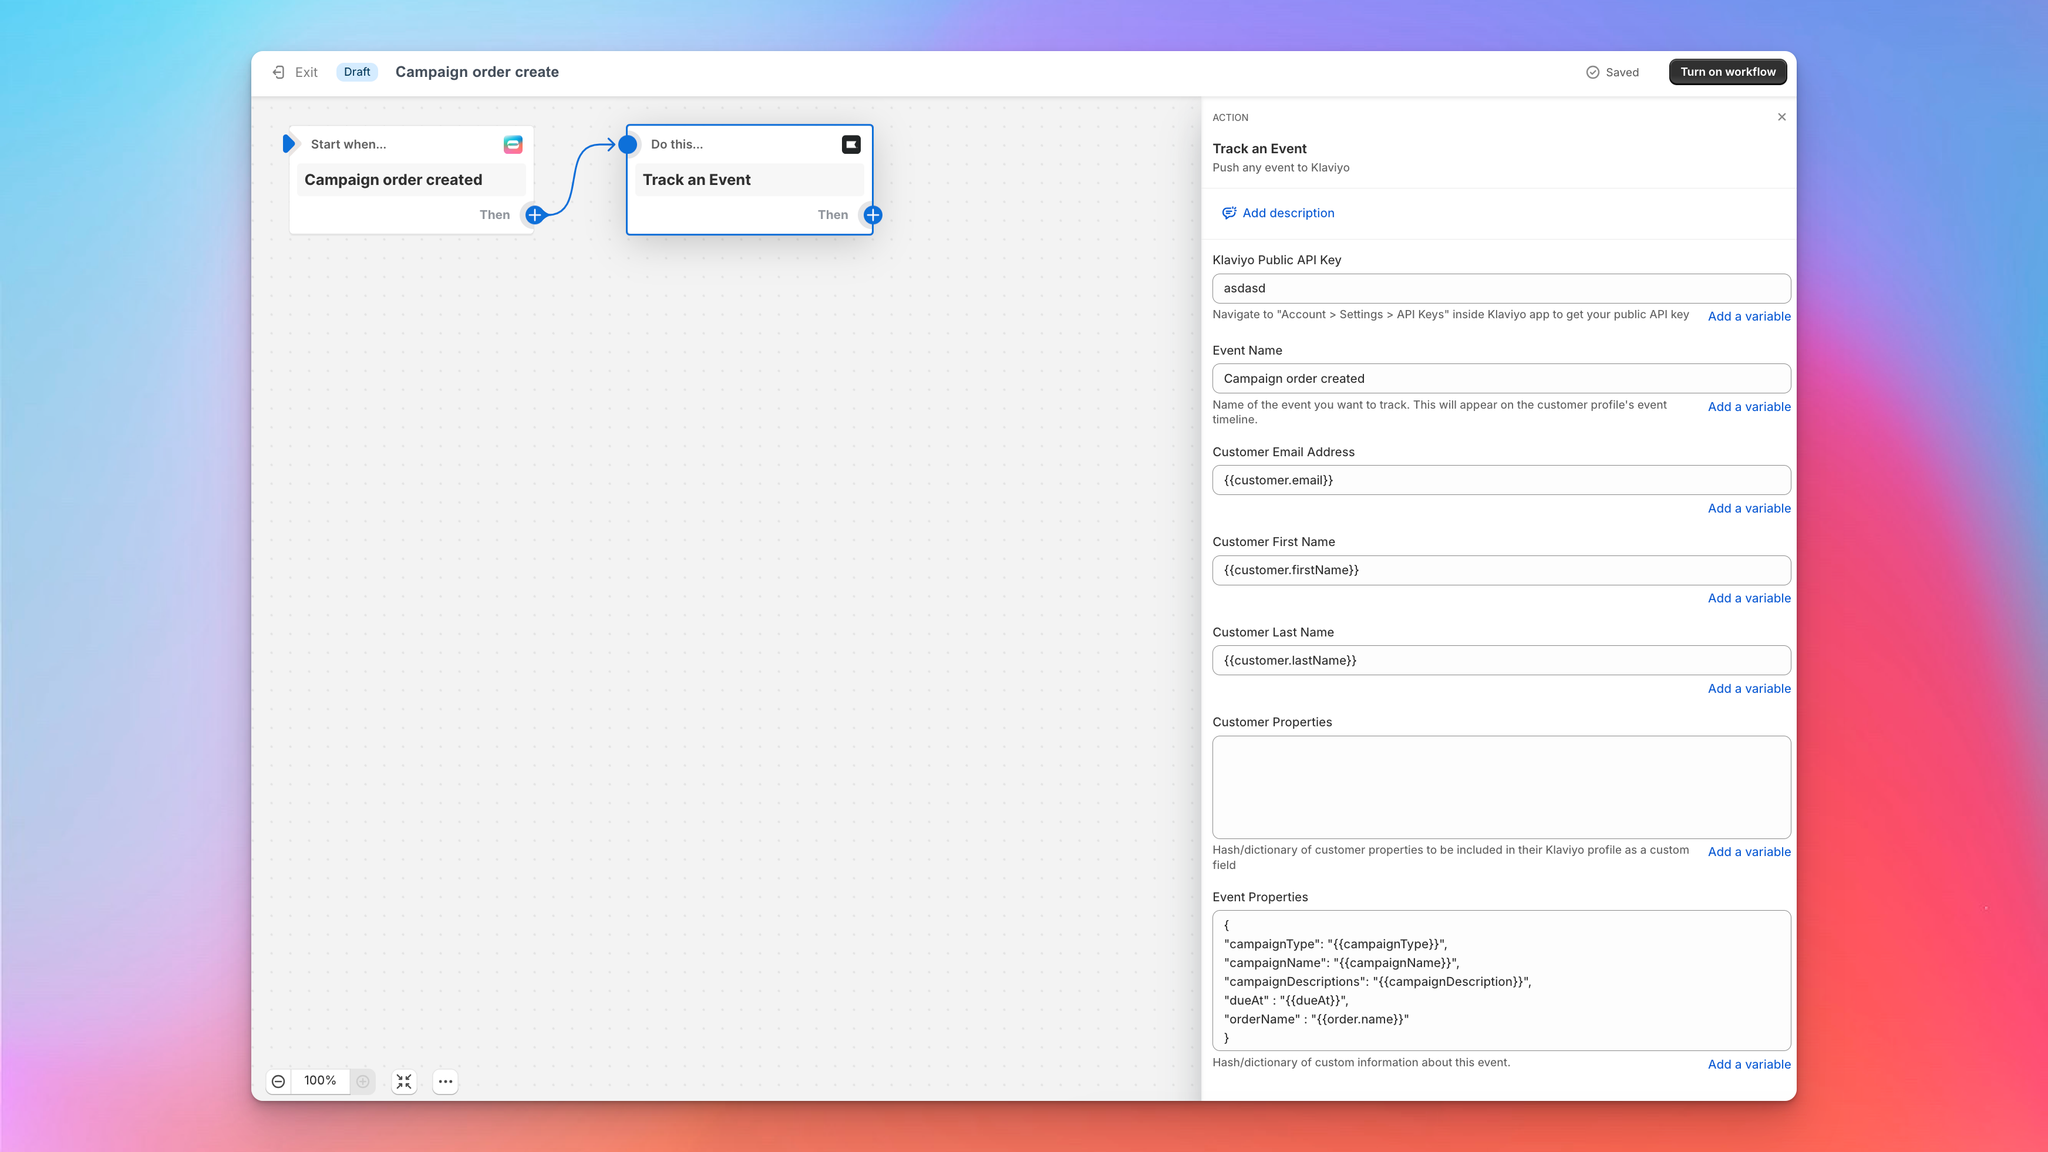
Step 6: Once imported you will need to edit each workflow Track even Action to have your Klaviyo accounts Public key.
To find this, in Klaviyo navigate to "Account > Settings > API Keys"
Replace the Public API key with yours and click Apply changes.
Step 8: Test your new workflows using the guide linked below.
4. Testing your Presale flow triggers
4.1 Charge failed
To test a charge failure trigger you will need to first place a test order with a card that will succeed at checkout and then change the payment method to one that will fail, listed below. This is because Shopify checkout will reject the failing card at checkout, but not if we attach it later.
Start by placing an order with a regular test card during checkout.
Once a Campaign order is created, navigate to the Customer account on Shopify and open the Payment methods you used at checkout.
Select the card you used, click Replace card, and enter the details below.
Card number: 4000000000000341
Expiry: 12/26
CSV: 123
ℹ️
Please note this test card only works in Shopify payments test mode
Once this is done you can attempt capturing the Campaign order.
4.2 Charge succeeded
Testing this flow trigger will require you to place a test campaign with a card that will succeed, wait till the campaign or payment is due to charge and once it’s successfully charged the flow will run and the event will be tracked in Klaviyo.
4.3 Refund succeeded
Testing this flow will require a Campaign order with a successful deposit charge made on it, your settings in Submarine will need to have the Refund deposits checkbox set to true (checked) and you will need to cancel the campaign order from Submarine before the full payment is taken. Once this is done the flow will run and the event will be tracked in Klaviyo.
4.4 Campaign upcoming charge
Testing the flow trigger requires a few days or an adjustment to your store's configuration which can be done by the Submarine team. The default configuration for all stores is 2 days prior to a Submarine related charge but it can be reduced for testing purposes if requested.
4.5 Campaign order created, fulfilled, or canceled.
Testing this flow trigger requires you to create a campaign and place an order against it. Once you place an order against the campaign this flow trigger will fire, to trigger fulfillment you can run the campaign to its end. To fire the cancellation flow you will need to cancel the campaign order.
4.8 Presale & Crowdfunding campaign launched, ended, and completed
To test this workflow you’ll need to move a campaign through each status. For each status change you’ll trigger a workflow.
5. Testing your Subscription flow triggers
5.1 Payment failed
To test a Payment failed trigger you will need to first place a test order with a card that will succeed at checkout and then change the payment method to one that will fail, listed below. This is because Shopify checkout will reject the failing card at checkout, but not if we attach it later.
Start by placing an order with a regular test card during checkout.
Once a subscription is created, navigate to the Customer account on Shopify and open the Payment methods you used at checkout.
Select the card you used, click Replace card, and enter the details below.
Card number: 4000000000000341
Expiry: 12/26
CSV: 123
ℹ️
Please note this test card only works in Shopify payments test mode
Once this is done you can attempt capturing the next Upcoming subscription order. To do this, navigate to the Subscription and open their next order, click More actions and Process now.
5.2 Subscription created
To test this trigger you will need to place an order for a Subscription item at checkout. Once the order has gone through, wait a few minutes, and you should see this flow has run.
5.3 Subscription updated
To test this trigger you will need an existing subscription and make an update to it, this can be a change in status, delivery address edits or product changes. Once you save the changes, wait a few moments and then this trigger will fire.
5.4 Subscription order created
Open an existing subscription or create a new one
Make an update to a specific upcoming subscription order, this can be a change in status, delivery address edits or product changes.
Save the changes and wait a few moments
Open the flow and check for recent runs.
5.5 Upcoming subscription order
To test this trigger, you will need an existing subscription and to set your next scheduled order to be due to renew exactly 3* days ahead.
*3 days is the default for the upcoming order notification to fire